Android LayoutInflater详解
在实际开发中LayoutInflater这个类还是非常有用的,它的作用类似于findViewById()。不同点是LayoutInflater是用来找res/layout/下的xml布局文件,并且实例化;而findViewById()是找xml布局文件下的具体widget控件(如Button、TextView等)。
具体作用:
1、对于一个没有被载入或者想要动态载入的界面,都需要使用LayoutInflater.inflate()来载入;
2、对于一个已经载入的界面,就可以使用Activiyt.findViewById()方法来获得其中的界面元素。
LayoutInflater 是一个抽象类,在文档中如下声明:
public abstract class LayoutInflater extends Object
获得 LayoutInflater 实例的三种方式
- LayoutInflater inflater = getLayoutInflater();//调用Activity的getLayoutInflater()
- LayoutInflater inflater = LayoutInflater.from(context);
- LayoutInflater inflater = (LayoutInflater)context.getSystemService
(Context.LAYOUT_INFLATER_SERVICE);
其实,这三种方式本质是相同的,从源码中可以看出:
getLayoutInflater():
Activity 的 getLayoutInflater() 方法是调用 PhoneWindow 的getLayoutInflater()方法,看一下该源代码:
public PhoneWindow(Context context)
{
super(context);
mLayoutInflater = LayoutInflater.from(context);}
可以看出它其实是调用 LayoutInflater.from(context)。
LayoutInflater.from(context):
public static LayoutInflater from(Context context)
{
LayoutInflater LayoutInflater = (LayoutInflater) context.getSystemService
     (Context.LAYOUT_INFLATER_SERVICE);

if (LayoutInflater == null)

{

 throw new AssertionError("LayoutInflater not found.");

}

return LayoutInflater;
}
可以看出它其实调用 context.getSystemService()。
结论:所以这三种方式最终本质是都是调用的Context.getSystemService()。
另外getSystemService()是Android很重要的一个API,它是Activity的一个方法,根据传入的NAME来取得对应的Object,然后转换成相应的服务对象。以下介绍系统相应的服务。
传入的Name 返回的对象 说明
WINDOW_SERVICE WindowManager 管理打开的窗口程序
LAYOUT_INFLATER_SERVICE LayoutInflater 取得xml里定义的view
ACTIVITY_SERVICE ActivityManager 管理应用程序的系统状态
POWER_SERVICE PowerManger 电源的服务
ALARM_SERVICE AlarmManager 闹钟的服务
NOTIFICATION_SERVICE NotificationManager 状态栏的服务
KEYGUARD_SERVICE KeyguardManager 键盘锁的服务
LOCATION_SERVICE LocationManager 位置的服务,如GPS
SEARCH_SERVICE SearchManager 搜索的服务
VEBRATOR_SERVICE Vebrator 手机震动的服务
CONNECTIVITY_SERVICE Connectivity 网络连接的服务
WIFI_SERVICE WifiManager Wi-Fi服务
TELEPHONY_SERVICE TeleponyManager 电话服务
inflate 方法
通过 sdk 的 api 文档,可以知道该方法有以下几种过载形式,返回值均是 View 对象,如下:
public View inflate (int resource, ViewGroup root)
public View inflate (XmlPullParser parser, ViewGroup root)
public View inflate (XmlPullParser parser, ViewGroup root, boolean attachToRoot)
public View inflate (int resource, ViewGroup root, boolean attachToRoot)
示意代码:
LayoutInflater inflater = (LayoutInflater)getSystemService(LAYOUT_INFLATER_SERVICE);
View view = inflater.inflate(R.layout.custom, (ViewGroup)findViewById(R.id.test));
//EditText editText = (EditText)findViewById(R.id.content);// error
EditText editText = (EditText)view.findViewById(R.id.content);
对于上面代码,指定了第二个参数 ViewGroup root,当然你也可以设置为 null 值。
注意:
·inflate 方法与 findViewById 方法不同;
·inflater 是用来找 res/layout 下的 xml 布局文件,并且实例化;
·findViewById() 是找具体 xml 布局文件中的具体 widget 控件(如:Button、TextView 等)。
LayoutInflater(布局服务)
本节引言:
本节继续带来的是Android系统服务中的LayoutInflater(布局服务),说到布局,大家第一时间 可能想起的是写完一个布局的xml,然后调用Activity的setContentView()加载布局,然后把他显示 到屏幕上是吧~其实这个底层走的还是这个LayoutInflater,用的Android内置的Pull解析器来解析 布局。一般在Android动态加载布局或者添加控件用得较多,本节我们就来学习下他在实际开发中 的一些用法~
1.LayoutInflater的相关介绍
1)Layout是什么鬼?
答:一个用于加载布局的系统服务,就是实例化与Layout XML文件对应的View对象,不能直接使用, 需要通过getLayoutInflater( )方法或getSystemService( )方法来获得与当前Context绑定的 LayoutInflater实例!
2)LayoutInflater的用法
①获取LayoutInflater实例的三种方法:
LayoutInflater inflater1 = LayoutInflater.from(this);
LayoutInflater inflater2 = getLayoutInflater();
LayoutInflater inflater3 = (LayoutInflater) getSystemService(LAYOUT_INFLATER_SERVICE);
PS:后面两个其实底层走的都是第一种方法~
②加载布局的方法:
public View inflate (int resource, ViewGroup root, boolean attachToRoot) 该方法的三个参数依次为:
①要加载的布局对应的资源id
②为该布局的外部再嵌套一层父布局,如果不需要的话,写null就可以了!
③是否为加载的布局文件的最外层套一层root布局,不设置该参数的话, 如果root不为null的话,则默认为true 如果root为null的话,attachToRoot就没有作用了! root不为null,attachToRoot为true的话,会在加载的布局文件最外层嵌套一层root布局; 为false的话,则root失去作用! 简单理解就是:是否为加载的布局添加一个root的外层容器~!
③通过LayoutInflater.LayoutParams来设置相关的属性:
比如RelativeLayout还可以通过addRule方法添加规则,就是设置位置:是参考父容器呢? 还是参考子控件?又或者设置margin等等,这个由你决定~
2.纯Java代码加载布局
我们早已习惯了使用XML生成我们需要的布局,但是在一些特定的情况下,我们 需要使用Java代码往我们的布局中动态的添加组件或者布局!
但是不建议大家完全地使用Java代码来编写Android页面布局,首先一点就是代码会多, 一多久容易乱,而且不利于业务的分离,我们还是建议使用xml来完成布局,然后通过 Java代码对里面的组件进行修改,当然有些时候可能需要使用Java动态的来添加组件!
纯Java代码加载布局的流程:
——Step 1:
①创建容器:LinearLayout ly = new LinearLayout(this);
②创建组件:Button btnOne = new Button(this);
——Step 2:
可以为容器或者组件设置相关属性: 比如:LinearLayout,我们可以设置组件的排列方向:ly.setOrientation(LinearLayout.VERTICAL); 而组件也可以:比如Button:btnOne.setText("按钮1"); 关于设置属性的方法可参见Android 的API,通常xml设置的属性只需在前面添加:set即可,比如 setPadding(左,上,右,下);
——Step 3:
将组件或容器添加到容器中,这个时候我们可能需要设置下组件的添加位置,或者设置他的大小: 我们需要用到一个类:LayoutParams,我们可以把它看成布局容器的一个信息包!封装位置与大小 等信息的一个类!先演示下设置大小的方法:(前面的LinearLayout可以根据不同容器进行更改)
LinearLayout.LayoutParams lp1 = new LinearLayout.LayoutParams(
        LayoutParams.WRAP_CONTENT, LayoutParams.WRAP_CONTENT);
很简单,接着就到这个设置位置了,设置位置的话,通常我们考虑的只是RelativeLayout! 这个时候用到LayoutParams的addRule( )方法!可以添加多个addRule( )哦! 设置组件在父容器中的位置,
比如设置组件的对其方式:
RelativeLayout rly = new RelativeLayout(this);
RelativeLayout.LayoutParams lp2 = new RelativeLayout.LayoutParams(
                LayoutParams.WRAP_CONTENT, LayoutParams.WRAP_CONTENT);
lp2.addRule(RelativeLayout.ALIGN_PARENT_BOTTOM);
Button btnOne = new Button(this);
rly.addView(btnOne, lp2);
参照其他组件的对其方式: (有个缺点,就是要为参考组件手动设置一个id,是手动!!!!) 比如:设置btnOne居中后,让BtnTwo位于btnOne的下方以及父容器的右边!
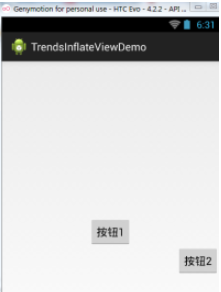
public class MainActivity extends Activity {
    @Override
    protected void onCreate(Bundle savedInstanceState) {
        super.onCreate(savedInstanceState);
        RelativeLayout rly = new RelativeLayout(this);
        Button btnOne = new Button(this);
        btnOne.setText("按钮1");
        Button btnTwo = new Button(this);
        btnTwo.setText("按钮2");
        // 为按钮1设置一个id值
        btnOne.setId(123);
        // 设置按钮1的位置,在父容器中居中
        RelativeLayout.LayoutParams rlp1 = new RelativeLayout.LayoutParams(
                LayoutParams.WRAP_CONTENT, LayoutParams.WRAP_CONTENT);
        rlp1.addRule(RelativeLayout.CENTER_IN_PARENT);
        // 设置按钮2的位置,在按钮1的下方,并且对齐父容器右面
        RelativeLayout.LayoutParams rlp2 = new RelativeLayout.LayoutParams(
                LayoutParams.WRAP_CONTENT, LayoutParams.WRAP_CONTENT);
        rlp2.addRule(RelativeLayout.BELOW, 123);
        rlp2.addRule(RelativeLayout.ALIGN_PARENT_RIGHT);
        // 将组件添加到外部容器中
        rly.addView(btnTwo, rlp2);
        rly.addView(btnOne, rlp1);
        // 设置当前视图加载的View即rly
        setContentView(rly);
    }
}
——step 4:
调用setContentView( )方法加载布局对象即可! 另外,如果你想移除某个容器中的View,可以调用容器.removeView(要移除的组件);
运行截图:
3.Java代码动态添加控件或xml布局
第二点我们讲解了使用纯Java代码来加载布局,实际当中用得并不多,更多的时候是动态 的添加View控件以及动态的加载XML布局!
1)Java代码动态增加View
动态添加组件的写法有两种,区别在于是否需要先setContentView(R.layout.activity_main); 下面演示下两种不同写法添加一个Button的例子:
先写个布局文件先:activity_main.xml:
<RelativeLayout xmlns:android="http://schemas.android.com/apk/res/android"
    android:id="@+id/RelativeLayout1"
    android:layout_width="match_parent"
    android:layout_height="match_parent" >

    <TextView
        android:id="@+id/txtTitle"
        android:layout_width="match_parent"
        android:layout_height="wrap_content"
        android:text="我是xml文件加载的布局"/>

</RelativeLayout>
第一种不需要setContentView()加载布局文件先:
public class MainActivity extends Activity {
    @Override
    protected void onCreate(Bundle savedInstanceState) {
        super.onCreate(savedInstanceState);
        Button btnOne = new Button(this);
        btnOne.setText("我是动态添加的按钮");
        RelativeLayout.LayoutParams lp2 = new RelativeLayout.LayoutParams(
                LayoutParams.WRAP_CONTENT, LayoutParams.WRAP_CONTENT);
        lp2.addRule(RelativeLayout.CENTER_IN_PARENT);
        LayoutInflater inflater = LayoutInflater.from(this);
        RelativeLayout rly = (RelativeLayout) inflater.inflate(
                R.layout.activity_main, null)
                .findViewById(R.id.RelativeLayout1);
        rly.addView(btnOne,lp2);
        setContentView(rly);
    }
}
第二种不需要setContentView()加载布局文件先:
public class MainActivity extends Activity {
    @Override
    protected void onCreate(Bundle savedInstanceState) {
        super.onCreate(savedInstanceState);
        setContentView(R.layout.activity_main);
        Button btnOne = new Button(this);
        btnOne.setText("我是动态添加的按钮");
        RelativeLayout.LayoutParams lp2 = new RelativeLayout.LayoutParams(
                LayoutParams.WRAP_CONTENT, LayoutParams.WRAP_CONTENT);
        lp2.addRule(RelativeLayout.CENTER_IN_PARENT);
        RelativeLayout rly = (RelativeLayout) findViewById(R.id.RelativeLayout1);
        rly.addView(btnOne,lp2);
    }
}
分析总结:
代码很简单,创建按钮后,我们又创建了一个LayoutParams对象,用来设置Button的大小, 又通过addRule()方法设置了Button的位置!
第一种方法:通过LayoutInflate的inflate()方法加载了activity_main布局,获得了外层容器, 接着addView添加按钮进容器,最后setContentView();
第二种方法:因为我们已经通过setContetView()方法加载了布局,此时我们就可以通过 findViewById找到这个外层容器,接着addView,最后setContentView()即可!
另外,关于这个setContentView( )他设置的视图节点是整个XML的根节点!
2)Java代码动态加载xml布局
接下来的话,我们换一个,这次加载的是xml文件!动态地添加xml文件! 先写下主布局文件和动态加载的布局文件:
activity_main.xml:
<RelativeLayout xmlns:android="http://schemas.android.com/apk/res/android"
    android:id="@+id/RelativeLayout1"
    android:layout_width="match_parent"
    android:layout_height="match_parent" >
    <Button
        android:id="@+id/btnLoad"
        android:layout_width="match_parent"
        android:layout_height="wrap_content"
        android:text="动态加载布局"/>
</RelativeLayout>
inflate.xml:
<?xml version="1.0" encoding="utf-8"?>
<LinearLayout xmlns:android="http://schemas.android.com/apk/res/android"
    android:layout_width="match_parent"
    android:layout_height="match_parent"
    android:gravity="center"
    android:orientation="vertical"
    android:id="@+id/ly_inflate" >

    <TextView
        android:layout_width="wrap_content"
        android:layout_height="wrap_content"
        android:text="我是Java代码加载的布局" />

    <Button
        android:layout_width="wrap_content"
        android:layout_height="wrap_content"
        android:text="我是布局里的一个小按钮" />

</LinearLayout>
接着到我们的MainActivity.java在这里动态加载xml布局:
public class MainActivity extends Activity {
    @Override
    protected void onCreate(Bundle savedInstanceState) {
        super.onCreate(savedInstanceState);
        setContentView(R.layout.activity_main);
        //获得LayoutInflater对象;
        final LayoutInflater inflater = LayoutInflater.from(this);
        //获得外部容器对象
        final RelativeLayout rly = (RelativeLayout) findViewById(R.id.RelativeLayout1);
        Button btnLoad = (Button) findViewById(R.id.btnLoad);
        btnLoad.setOnClickListener(new OnClickListener() {
            @Override
            public void onClick(View v) {
                //加载要添加的布局对象
                LinearLayout ly = (LinearLayout) inflater.inflate(
                        R.layout.inflate, null, false).findViewById(
                        R.id.ly_inflate);
                //设置加载布局的大小与位置
                RelativeLayout.LayoutParams lp = new RelativeLayout.LayoutParams(
                        LayoutParams.WRAP_CONTENT, LayoutParams.WRAP_CONTENT);
                lp.addRule(RelativeLayout.CENTER_IN_PARENT);
                rly.addView(ly,lp);
            }
        });
    }
}
运行截图:

代码分析:
①获取容器对象:
final RelativeLayout rly = (RelativeLayout) findViewById(R.id.RelativeLayout1);②获得Inflater对象,同时加载被添加的布局的xml,通过findViewById找到最外层的根节点
final LayoutInflater inflater = LayoutInflater.from(this);
LinearLayout ly = (LinearLayout) inflater.inflate(R.layout.inflate, null, false)
   .findViewById(R.id.ly_inflate);
③为这个容器设置大小与位置信息:
RelativeLayout.LayoutParams lp = new RelativeLayout.LayoutParams(
               LayoutParams.WRAP_CONTENT, LayoutParams.WRAP_CONTENT);
       lp.addRule(RelativeLayout.CENTER_IN_PARENT);
④添加到外层容器中:
rly.addView(ly,lp);
4.LayoutInflater的inflate()方法源码
最后提供下LayoutInflater的inflate()方法的源码吧,有兴趣的可以看看~,其实就是Pull解析而已~
public View inflate(XmlPullParser parser, ViewGroup root, boolean attachToRoot) {
    synchronized (mConstructorArgs) {
        final AttributeSet attrs = Xml.asAttributeSet(parser);
        mConstructorArgs[0] = mContext;
        View result = root;
        try {
            int type;
            while ((type = parser.next()) != XmlPullParser.START_TAG &&
                    type != XmlPullParser.END_DOCUMENT) {
            }
            if (type != XmlPullParser.START_TAG) {
                throw new InflateException(parser.getPositionDescription()
                        + ": No start tag found!");
            }
            final String name = parser.getName();
            if (TAG_MERGE.equals(name)) {
                if (root == null || !attachToRoot) {
                    throw new InflateException("merge can be used only with a valid "
                            + "ViewGroup root and attachToRoot=true");
                }
                rInflate(parser, root, attrs);
            } else {
                View temp = createViewFromTag(name, attrs);
                ViewGroup.LayoutParams params = null;
                if (root != null) {
                    params = root.generateLayoutParams(attrs);
                    if (!attachToRoot) {
                        temp.setLayoutParams(params);
                    }
                }
                rInflate(parser, temp, attrs);
                if (root != null && attachToRoot) {
                    root.addView(temp, params);
                }
                if (root == null || !attachToRoot) {
                    result = temp;
                }
            }
        } catch (XmlPullParserException e) {
            InflateException ex = new InflateException(e.getMessage());
            ex.initCause(e);
            throw ex;
        } catch (IOException e) {
            InflateException ex = new InflateException(
                    parser.getPositionDescription()
                    + ": " + e.getMessage());
            ex.initCause(e);
            throw ex;
        }
        return result;
    }
}
本段来源: http://www.runoob.com/w3cnote/android-tutorial-layoutinflater.html

我们在Android开发中,对于将布局填充成View对象,最常用的两种办法是:View类的方法inflate和LayoutInflater类的inflate方法,

今天有朋友问到这两种填充方法的区别,就查看了一下两者的区别,写成文章,以方便有需要的人。

首先我们要清楚两者大致的区别,之后我们再来慢慢看两者具体的不同之处。
LayoutInflater类的inflate方法适用于所有需要进行布局填充的场景,是Android中专门进行布局填充的方法,Android中其他需要
使用布局填充的地方,都会调用本方法,而不是View类中的inflate方法。该方法不是静态方法,需要先创建LayoutInflater类的对象
才能调用。


View类中的inflate方法内部包裹了LayoutInflater类的inflate方法,这个方法是一个静态方法,不需要创建View类的对象,直接使用
View类名调用,相比上一种方法是一种简便方法。但很明显,这个方法不如上一个方法功能强大。

若是您只想大概了解两者的区别,您读到这里已经足够了,下面的分析较为详细,请根据您的需要阅读下面的内容。
现在我们开始慢慢的研究两者具体的不同之处。
因为LayoutInflater类的inflate方法是所有布局填充方法的基石,我们先来看看这个方法吧。
我们从Google官方的SDK中的定义入手,得到比较标准的概念。

关于LayoutInflater类
该类是一个抽象类,继承自Object,存在于android.view包下。接下来我们只看和本文相关的内容,
不会再做过多的扩展。
以下是SDK中的叙述:
Instantiates a layout XML file into its corresponding View objects. It is never used directly. Instead, use getLayoutInflater() or getSystemService(String) to retrieve a standard LayoutInflater instance that is already hooked up to the current context and correctly configured for the device you are running on. For example:
LayoutInflater inflater = (LayoutInflater)context.getSystemService(Context.LAYOUT_INFLATER_SERVICE);
To create a new LayoutInflater with an additional LayoutInflater.Factory for your own views, you can use cloneInContext(Context) to clone an existing ViewFactory, and then call setFactory(LayoutInflater.Factory) on it to include your Factory.

For performance reasons, view inflation relies heavily on pre-processing of XML files that is done at build time. Therefore, it is not currently possible to use LayoutInflater with an XmlPullParser over a plain XML file at runtime; it only works with an XmlPullParser returned from a compiled resource (R.something file.)
翻译和阐述:
LayoutInflater类的作用是,将xml布局文件实例化为它对应的View对象。这个类不能直接使用,也就是不能直接调用其中的成员。一般,我们通过getLayoutInflater()方法或者 getSystemService(String)
方法来获得该类的实例,通过以上两个方法获得的LayoutInflater类实例,已经和当前的上下文关联起来,并且已经正确配置在当前程序运行的设备上。我们顺便说一下这两个获得实例的方法:getLayoutInflater()方法,
并不是上下文的方法,Activity类有这个方法,不需要传入参数,在Activity中直接调用即可。Fragment类也有这个方法,但是需要传入一个Bundle对象作为参数。可以看到,通过该方法获得的LayoutInflater类对象
和上下文环境相配合。getSystemService(String)方法是Context的方法,需要传入Context的成员变量作为参数,获得相应的对象,要获得LayoutInflater对象,需要传入Context.LAYOUT_INFLATER_SERVICE
以上介绍的LayoutInflater类是Android系统为我们提供的通用类,如果我们想要为我们的View对象创建专用的LayoutInflater类,则可以用到LayoutInflater.Factory ,这是一个LayoutInflater类内部的接口,通过
工厂设计模式可以使我们获得定制的专用LayoutInflater类。我们可以使用cloneInContext(Context)来克隆一个已经存在的ViewFactory,然后调用setFactory(LayoutInflater.Factory)方法,将我们创建好的
工厂包括进来。在这里我大概说明一下这段话的意思和作用:当我在一个上下文环境中创建好了一个LayoutInflater工厂之后,我们又想在另一个上下文环境中使用这个LayoutInflater工厂,那该怎么办?这里说的一种方法
是,我们在当前上下文环境中,使用LayoutInflater类对象调用cloneInContext(Context)方法,其中的参数填写新上下文对象,因为我们要在新的上下文环境中使用。然后接着调用setFactory(LayoutInflater.Factory)方法,
其中的参数就是我们目前创建的LayoutInflater工厂。这样创建完成后,我们在新上下文环境中,就可以调用目前上下文环境中绑定了LayoutInflater工厂的LayoutInflater类对象了。关于这里的更详细用法在本文中就不更多阐述了,有兴趣的朋友请参看我的另一篇文章。
xml文件在创建阶段的前处理过程严重影响View对象填充阶段的性能(进而影响整体软件的性能),这是因为inflate方法内部使用的pull解析,若是xml文件在进行填充之前已经被xml解析了,那么inflate方法在使用时就非常轻松,否则会非常困难。因此,我们不会使用LayoutInflater类处理普通的xml文件,而是用来处理已经编译的xml文件,例如R.··········,这样的xml文件会返回一个已经解析了xml文件的pull解析器,而普通的xml文件返回的解析器则不然。更详细的内容请参看我的另一篇文章。

好啦,通过以上介绍,我们大概对LayoutInflater类有了一个大概了解,之后我们来看以下这个类中的4个重载的inflate方法应该如何使用。
这4个方法中,有两个是通过XmlPullParser作为数据来源创建view对象,剩下两个就是我们平时常用的两个通过resource目录下的文件作为数据来源的方法。
前两个方法在此我们不做详细介绍,这两个方法我们平时工作根本不会用,但是Android源文件中则大量使用,后边我们详细介绍的方法内部就是用前两种实现的。今后我会在其他文章中细细的分析这两个方法的使用,希望能帮助到感兴趣的朋友。


接下来我们就看看下边两个常用方法的使用。


三个参数的方法

public View inflate (int resource, ViewGroup root, boolean attachToRoot)
Inflate a new view hierarchy from the specified xml resource. Throws InflateException if there is an error.

从指定的xml文件生成新的view视图关系。出现错误时,抛出InflateException异常。

参数分析

第一个参数,就是我们要填充的xml文件

第二个参数,这个要和第三个参数有关系,大家慢慢看。若是第三个参数为true,那么第二个参数的意义是,从第一个参数填充成的view对象的父控件;若是第三个参数为false,那么第二个参数的意义是,

可以为第一个参数生成的view对象的根布局提供一系LayoutParams参数的控件。

第三个参数,从第一个参数填充成的view对象是否要附着到第二个参数指定的空间上作为子控件。


说明:第一个参数不需多说,我们一般就从resource目录下找到我们要填充的布局文件即可,切不可用普通的xml文件进行填充,除非我们自己做好了相应的xmlpullparser。

若第二个参数为null,也就是我们不指定父控件,那么新生产的view对象的根布局的某些参数会失效,比如Layout_width和Layout_height会失效,这个大家可以做实验尝试,无论第三个参数是什么。

关于该方法的使用只介绍到这里,更详细的用法请查找专门讲解该方法的文章。


返回:若提供了root,且第三个参数为true,则返回root作为根布局,否则,返回填充出的view对象的根布局作为根布局。


两个参数的用法

public View inflate (int resource, ViewGroup root)
从指定的xml文件生成新的view视图关系。出现错误时,抛出InflateException异常。

参数分析:

第一个参数,要填充的xml文件。

第二个参数,生成的view对象的父控件。同样该参数可以为null。若提供了root,则返回root作为根布局,否则,返回填充出的view对象的根布局作为根布局。


该方法内部调用了三个参数的方法,请看下面源码:

public View inflate(@LayoutRes int resource, @Nullable ViewGroup root) {
 return inflate(resource, root, root != null);
 }
两个参数方法的使用完全和三个参数方法相对应,在此不做更多介绍。


关于View类的inflate方法

public static View inflate (Context context, int resource, ViewGroup root)
Inflate a view from an XML resource. This convenience method wraps the LayoutInflater class, which provides a full range of options for view inflation.

 将一个xml资源填充成一个view对象。这个简便的方法包裹了LayoutInflater类,后者提供了view对象填充的所有方法。

参数分析:

第一个参数,上下文

第二个参数,要填充的xml资源

第三个参数,填充成的view对象的根布局


说明,从SDK解释中的“convenience”一词中,我们就可以看到View类中inflate的主要特点,就是简便。它将LayoutInflater类封装,且是一个静态方法,便于调用。

以下为源码:


public static View inflate(Context context, @LayoutRes int resource, ViewGroup root) {
 LayoutInflater factory = LayoutInflater.from(context);
 return factory.inflate(resource, root);
 }
可以看到其内部也就是调用了LayoutInflater两个参数的inflate方法而已,已经在上面介绍过了,不再赘述。


好啦,那我们总结一下吧:

LayoutInflater类的inflate方法适用于所有需要进行布局填充的场景,是Android中专门进行布局填充的方法,Android中其他需要

使用布局填充的地方,都会调用本方法,而不是View类中的inflate方法。该方法不是静态方法,需要先创建LayoutInflater类的对象

才能调用。


View类中的inflate方法内部包裹了LayoutInflater类的inflate方法,这个方法是一个静态方法,不需要创建View类的对象,直接使用

View类名调用,相比上一种方法是一种简便方法。但很明显,这个方法不如上一个方法功能强大。


