项目测试的时候发现,按home键回到桌面,再用360清理内存,软件被结束,再次进入的时候报错,看了下log,以为是有的地方没有控制好,但是又不知道360结束的是什么(这个现在还没弄明白)。使用小米系统的进程管理优化内存就不报错。
后来想到用Service防止软件被kill掉,查了下资料,发现google 管方就有,ForegroundService 前台服务,让服务一直以前台任务的方式运行,可以在service 的oncreate来实现前台服务, 通过这个方法必须发送一个通知栏,让用户知道服务在运行。
Notification notification = new Notification(R.drawable.icon, "服务开启", System.currentTimeMillis());
notification.flags|= Notification.FLAG_NO_CLEAR;
notification.flags=Notification.FLAG_ONGOING_EVENT;
Intent notificationIntent = new Intent(this, MainActivity.class);
PendingIntent pendingIntent = PendingIntent.getActivity(this, 0, notificationIntent, 0);
notification.setLatestEventInfo(this, "service", "防止服务被任务管理器所杀", pendingIntent);
startForeground(ONGOING_NOTIFICATION, notification);
这样就能保持service 运行,可是通知栏不能清除 ,一清除就会被kill。
后来一次 做自定义Notification的时候,通知栏没有显示通知,查看后发现 service 也没被kill 。所以就进一步去研究了下 最后发现 只用两行代码就能保持服务不会被kill,并且不会有通知栏通知代码如下:
Notification notification = new Notification();
startForeground(1, notification);
完整代码如下:
public class TestService extends Service {
private static final Class[] mStartForegroundSignature = new Class[] {
int.class, Notification.class };
private static final Class[] mStopForegroundSignature = new Class[] { boolean.class };
private NotificationManager mNM;
private Method mStartForeground;
private Method mStopForeground;
private Object[] mStartForegroundArgs = new Object[2];
private Object[] mStopForegroundArgs = new Object[1];
@Override
public IBinder onBind(Intent intent) {
return null;
}
@Override
public void onCreate() {
super.onCreate();
mNM = (NotificationManager) getSystemService(Context.NOTIFICATION_SERVICE);
try {
mStartForeground = TestService.class.getMethod("startForeground",
mStartForegroundSignature);
mStopForeground = TestService.class.getMethod("stopForeground",
mStopForegroundSignature);
} catch (NoSuchMethodException e) {
mStartForeground = mStopForeground = null;
}
// 我们并不需要为 notification.flags 设置 FLAG_ONGOING_EVENT,因为
// 前台服务的 notification.flags 总是默认包含了那个标志位
Notification notification =new Notification();
// 注意使用 startForeground ,id 为 0 将不会显示 notification
startForegroundCompat(1, notification);
}
@Override
public void onDestroy() {
super.onDestroy();
stopForegroundCompat(1);
}
// 以兼容性方式开始前台服务
private void startForegroundCompat(int id, Notification n) {
if (mStartForeground != null) {
mStartForegroundArgs[0] = id;
mStartForegroundArgs[1] = n;
try {
mStartForeground.invoke(this, mStartForegroundArgs);
} catch (IllegalArgumentException e) {
e.printStackTrace();
} catch (IllegalAccessException e) {
e.printStackTrace();
} catch (InvocationTargetException e) {
e.printStackTrace();
}
return;
}
mNM.notify(id, n);
}
// 以兼容性方式停止前台服务
private void stopForegroundCompat(int id) {
if (mStopForeground != null) {
mStopForegroundArgs[0] = Boolean.TRUE;
try {
mStopForeground.invoke(this, mStopForegroundArgs);
} catch (IllegalArgumentException e) {
e.printStackTrace();
} catch (IllegalAccessException e) {
e.printStackTrace();
} catch (InvocationTargetException e) {
e.printStackTrace();
}
return;
}
// 在 setForeground 之前调用 cancel,因为我们有可能在取消前台服务之后
// 的那一瞬间被kill掉。这个时候 notification 便永远不会从通知一栏移除
mNM.cancel(id);
}
}
经测试,360手机助手,腾讯手机管家都不能kill这个service,但是手动结束后,再次打开发现音频还在播放(跟音频有关的客户端),感觉有点小别扭...
Android应用进程防杀指南1-常用套路
我们常用的进程守护的套路无外乎以下几种,大部分内容摘录自Never-say-Never的博客
套路一.提高进程的优先级数值
对于Service被系统回收,一般做法是通过提高优先级可以解决,在AndroidManifest.xml文件中对于intent-filter可以通过android:priority = “1000”这个属性设置最高优先级,1000是最高值,如果数字越小则优先级越低。
套路二.改变进程等级
Android中的进程是托管的,当系统进程空间紧张的时候,会依照优先级自动进行进程的回收。Android将进程分为6个等级,它们按优先级顺序由高到低依次是:
1.前台进程( FOREGROUND_APP)
2.可视进程(VISIBLE_APP )
3.次要服务进程(SECONDARY_SERVER )
4.后台进程 (HIDDEN_APP)
5.内容供应节点(CONTENT_PROVIDER)
6.空进程(EMPTY_APP)
我们可以用 setForeground(true) 来设置 Service 的优先级。
1.如果service正在调用onCreate,onStartCommand或者onDestory方法,那么用于当前service的进程则变为前台进程以避免被killed。
2.如果当前service已经被启动(start),拥有它的进程则比那些用户可见的进程优先级低一些,但是比那些不可见的进程更重要,这就意味着service一般不会被killed.
3.如果客户端已经连接到service
(bindService),那么拥有Service的进程则拥有最高的优先级,可以认为service是可见的。
4.如果service可以使用startForeground(int,
Notification)方法来将service设置为前台状态,那么系统就认为是对用户可见的,并不会在内存不足时killed。
5.如果有其他的应用组件作为Service,Activity等运行在相同的进程中,那么将会增加该进程的重要性。
套路三.设置 android:persistent属性为true
- <application
- android:name="com.test.Application"
- android:allowBackup="true"
- android:icon="@drawable/ic_launcher"
- android:label="@string/app_name"
- <span style="color:#ff0000;"> android:persistent="true"</span>
- android:theme="@style/AppTheme" >
- </application>
这个属性设置后,的确发现优先级提高不少,或许是相当于系统级的进程,但是还是无法保证存活
套路四.onDestory方法内调用广播,重启Service
当service执行了onDestory的时候,发送一个自定义的广播,当收到广播的时候,重新启动service
- public void onDestroy() {
- Intent sevice = new Intent(this, MainService.class);
- this.startService(sevice);
- super.onDestroy();
- }
但是当使用类似于360卫士和腾讯管家等第三方应用或是在setting里-应用-强制停止时,APP进程可能就直接被干掉了,onDestroy方法都进不来,所以还是无法保证存活
套路五.监听系统广播判断Service状态
通过系统的一些广播,比如:手机重启、界面唤醒、应用状态改变等等监听并捕获到,然后判断我们的Service是否还存活,记得加权限
- <receiver android:name="com.dbjtech.acbxt.waiqin.BootReceiver" >
- <intent-filter>
- <action android:name="android.intent.action.BOOT_COMPLETED" />
- <action android:name="android.intent.action.USER_PRESENT" />
- <action android:name="android.intent.action.PACKAGE_RESTARTED" />
- <action android:name="com.dbjtech.waiqin.destroy" />
- </intent-filter>
- </receiver>
在BroadcastReceiver中:
- @Override
- public void onReceive(Context context, Intent intent) {
- if (Intent.ACTION_BOOT_COMPLETED.equals(intent.getAction())) {
- System.out.println("手机开机了....");
- startUploadService(context);
- }
- if (Intent.ACTION_USER_PRESENT.equals(intent.getAction())) {
- startUploadService(context);
- }
- }
这个方法监听多了会导致Service很混乱,带来诸多麻烦
套路六.将APK安装到/system/app成为系统级应用
使用ROOT过的手机
1.把代码编写好后,打包导出apk,copy到手机SD卡根目录下。
2.手机连接eclipse,cmd: adb shell
3.切换root模式,输入:su (如果root过就不会有错误)
4.设置System为读写权限:mount –o remount rw /system (System默认为只读,无法写入,这一步很关键)
5.cd到sd卡跟目录下,确认是否有我们拷贝到sd卡根目录下的apk(一般都是 storage/sdcard0)
shell@android:/ # cd storage/sdcard0
6.最后,我们要把apk拷贝到 /System/app中
参考链接:http://blog.csdn.net/mad1989/article/details/22492519
Android应用进程防杀指南2-双进程守护
假设我们的APP中开启了两个Service,分别是A和B,那么:
如果A守护B,则B挂掉的同时,A就应该把B启动起来,反之亦然,也就是说A和B应该是互相守护,无论谁被杀掉,对方就把它拉起来。
既然提到了两个Service,那么这两个Service就不能让它们同处在一个进程中,否则就会被一次性双杀。这里我们很容易想到IPC技术,在Android中通常我们可以使用AIDL来实现IPC操作。废话不多说,直接撸码。
先来看下项目整体结构:
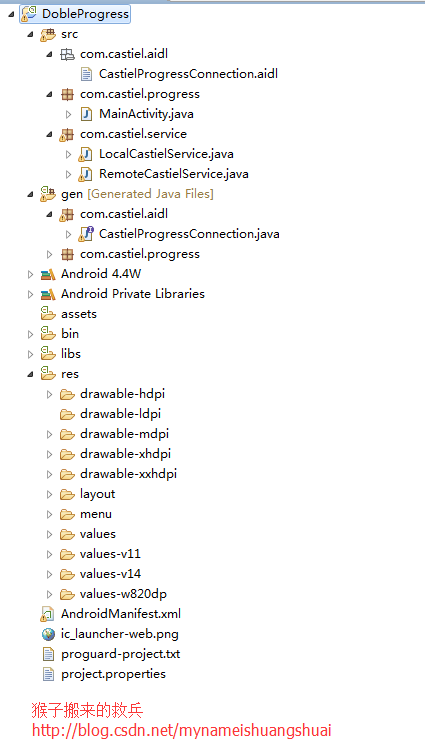
这里,我们定义两个Service,分别是LocalCastielService和RemoteCastielService,其中的RemoteCastielService我们通过属性配置android:process=”:com.castiel.remote” ,让它成为远端进程。
LocalCastielService.java
/**
* @ClassName: LocalCastielService
* @Description: 本地服务
* @author 猴子搬来的救兵 http://blog.csdn.net/mynameishuangshuai
* @version
*/
public class LocalCastielService extends Service {
MyBinder myBinder;
private PendingIntent pintent;
MyServiceConnection myServiceConnection;
@Override
public void onCreate() {
super.onCreate();
if (myBinder == null) {
myBinder = new MyBinder();
}
myServiceConnection = new MyServiceConnection();
}
@Override
public int onStartCommand(Intent intent, int flags, int startId) {
this.bindService(new Intent(this, RemoteCastielService.class), myServiceConnection, Context.BIND_IMPORTANT);
Notification notification = new Notification(R.drawable.ic_launcher, "猴子服务启动中", System.currentTimeMillis());
pintent = PendingIntent.getService(this, 0, intent, 0);
notification.setLatestEventInfo(this, "猴子服务", "防止被杀掉!", pintent);
// 设置service为前台进程,避免手机休眠时系统自动杀掉该服务
startForeground(startId, notification);
return START_STICKY;
}
class MyServiceConnection implements ServiceConnection {
@Override
public void onServiceConnected(ComponentName arg0, IBinder arg1) {
Log.i("castiel", "远程服务连接成功");
}
@Override
public void onServiceDisconnected(ComponentName arg0) {
// 连接出现了异常断开了,RemoteService被杀掉了
Toast.makeText(LocalCastielService.this, "远程服务Remote被干掉", Toast.LENGTH_LONG).show();
// 启动RemoteCastielService
LocalCastielService.this.startService(new Intent(LocalCastielService.this, RemoteCastielService.class));
LocalCastielService.this.bindService(new Intent(LocalCastielService.this, RemoteCastielService.class),
myServiceConnection, Context.BIND_IMPORTANT);
}
}
class MyBinder extends CastielProgressConnection.Stub {
@Override
public String getProName() throws RemoteException {
return "Local猴子搬来的救兵 http://blog.csdn.net/mynameishuangshuai";
}
}
@Override
public IBinder onBind(Intent arg0) {
return myBinder;
}
}
RemoteCastielService.java
/**
*
* @ClassName: RemoteCastielService
* @Description: 远程服务
* @author 猴子搬来的救兵 http://blog.csdn.net/mynameishuangshuai
*/
public class RemoteCastielService extends Service {
MyBinder myBinder;
private PendingIntent pintent;
MyServiceConnection myServiceConnection;
@Override
public void onCreate() {
super.onCreate();
if (myBinder == null) {
myBinder = new MyBinder();
}
myServiceConnection = new MyServiceConnection();
}
@Override
public int onStartCommand(Intent intent, int flags, int startId) {
this.bindService(new Intent(this,LocalCastielService.class), myServiceConnection, Context.BIND_IMPORTANT);
Notification notification = new Notification(R.drawable.ic_launcher,
"猴子服务启动中",
System.currentTimeMillis());
pintent=PendingIntent.getService(this, 0, intent, 0);
notification.setLatestEventInfo(this, "猴子服务",
"防止被杀掉!", pintent);
//设置service为前台进程,避免手机休眠时系统自动杀掉该服务
startForeground(startId, notification);
return START_STICKY;
}
class MyServiceConnection implements ServiceConnection {
@Override
public void onServiceConnected(ComponentName arg0, IBinder arg1) {
Log.i("castiel", "本地服务连接成功");
}
@Override
public void onServiceDisconnected(ComponentName arg0) {
// 连接出现了异常断开了,LocalCastielService被杀死了
Toast.makeText(RemoteCastielService.this, "本地服务Local被干掉", Toast.LENGTH_LONG).show();
// 启动LocalCastielService
RemoteCastielService.this.startService(new Intent(RemoteCastielService.this,LocalCastielService.class));
RemoteCastielService.this.bindService(new Intent(RemoteCastielService.this,LocalCastielService.class), myServiceConnection, Context.BIND_IMPORTANT);
}
}
class MyBinder extends CastielProgressConnection.Stub {
@Override
public String getProName() throws RemoteException {
return "Remote猴子搬来的救兵 http://blog.csdn.net/mynameishuangshuai";
}
}
@Override
public IBinder onBind(Intent arg0) {
return myBinder;
}
}
aidl文件
package com.castiel.aidl;
interface CastielProgressConnection{
String getProName();
}
启动服务
public class MainActivity extends Activity {
@Override
protected void onCreate(Bundle savedInstanceState) {
super.onCreate(savedInstanceState);
setContentView(R.layout.activity_main);
// 启动本地服务和远程服务
startService(new Intent(this, LocalCastielService.class));
startService(new Intent(this, RemoteCastielService.class));
}
通过以上代码可以看出,双进程守护实现代码非常简单,两个服务相互连接,Local服务连接着Remote服务,Remote服务又连接着Local服务,你中有我我中有你,一旦两个服务发现对方被杀掉,另一服务立刻会启动并连接它,下面我给大家演示一下。

查看一下系统打印日志:


