前言
HttpSession是通过Servlet容器创建和管理的,像Tomcat/Jetty都是保存在内存中的。但是我们把应用搭建成分布式的集群,然后利用LVS或Nginx做负载均衡,那么来自同一用户的Http请求将有可能被分发到多个不同的应用中。那问题来了,如何保证不同的应用能够共享同一份session数据呢?最简单的想法,就是把session数据保存到内存以外的一个统一的地方,例如Memcached/Redis等数据库中。那问题又来了,如何替换掉Servlet容器创建和管理的HttpSession的实现呢?
1、利用Servlet容器提供的插件功能,自定义HttpSession的创建和管理策略,并通过配置的方式替换掉默认的策略。这方面其实早就有开源项目了,例如memcached-session-manager(可以参考负载均衡+session共享(memcached-session-manager实现),以及tomcat-redis-session-manager。不过这种方式有个缺点,就是需要耦合Tomcat/Jetty等Servlet容器的代码。
2、设计一个Filter,利用HttpServletRequestWrapper,实现自己的 getSession()方法,接管创建和管理Session数据的工作。spring-session就是通过这样的思路实现的。
参考 spring-session之一 初探 spring-session
本博客不涉及session解释,关于session大家自行去查资料;关于spring-session的相关概念大家可以去spring官网查阅(http://projects.spring.io/spring-session/)。
单机应用
我们先来看下单机应用,应用很简单,就是在session中设置变量,然后获取这些设置的变量进行展示 ,具体代码如下
pom.xml:
<project xmlns="http://maven.apache.org/POM/4.0.0" xmlns:xsi="http://www.w3.org/2001/XMLSchema-instance"
    xsi:schemaLocation="http://maven.apache.org/POM/4.0.0 http://maven.apache.org/maven-v4_0_0.xsd">
    <modelVersion>4.0.0</modelVersion>
    <groupId>com.yzb.lee</groupId>
    <artifactId>spring-session</artifactId>
    <packaging>war</packaging>
    <version>0.0.1-SNAPSHOT</version>
    <name>spring-session Maven Webapp</name>
    <url>http://maven.apache.org</url>

    <properties>
        <maven.compiler.source>1.8</maven.compiler.source>
        <maven.compiler.target>1.8</maven.compiler.target>
    </properties>

    <dependencies>
        <dependency>
            <groupId>javax.servlet</groupId>
            <artifactId>jstl</artifactId>
            <version>1.2</version>
        </dependency>

        <dependency>
            <groupId>junit</groupId>
            <artifactId>junit</artifactId>
            <version>3.8.1</version>
            <scope>test</scope>
        </dependency>
    </dependencies>
    <build>
        <finalName>spring-session</finalName>
    </build>
</project>
----------------
web.xml
<?xml version="1.0" encoding="UTF-8"?>
<web-app>
    <display-name>Archetype Created Web Application</display-name>

    <servlet>
        <servlet-name>session</servlet-name>
        <servlet-class>com.yzb.lee.servlet.SessionServlet</servlet-class>
    </servlet>
    <servlet-mapping>
        <servlet-name>session</servlet-name>
        <url-pattern>/session</url-pattern>
    </servlet-mapping>

    <welcome-file-list>
        <welcome-file>index.jsp</welcome-file>
    </welcome-file-list>
</web-app>
--------------------------
SessionServlet.java
package com.yzb.lee.servlet;

import java.io.IOException;

import javax.servlet.ServletException;
import javax.servlet.http.HttpServlet;
import javax.servlet.http.HttpServletRequest;
import javax.servlet.http.HttpServletResponse;

public class SessionServlet extends HttpServlet {

    private static final long serialVersionUID = 1L;

    @Override
    protected void doPost(HttpServletRequest req, HttpServletResponse resp)
            throws ServletException, IOException {
        String attributeName = req.getParameter("attributeName");
        String attributeValue = req.getParameter("attributeValue");
        req.getSession().setAttribute(attributeName, attributeValue);

        resp.sendRedirect(req.getContextPath() + "/");
    }
}
--------------------------
index.jsp
<%@ taglib prefix="c" uri="http://java.sun.com/jsp/jstl/core" %>
<%@ page isELIgnored="false" %>
<!DOCTYPE html>
<html lang="en">
<head>
<title>Session Attributes</title>
</head>
<body>
<div class="container">
<h1>Description</h1>
<p>This application demonstrates how to use a Redis instance to back your session. Notice that there is no JSESSIONID cookie. We are also able to customize the way of identifying what the requested session id is.</p>
<h1>Try it</h1>
<form class="form-inline" role="form" action="./session" method="post">
<label for="attributeName">Attribute Name</label>
<input id="attributeName" type="text" name="attributeName"/>
<label for="attributeValue">Attribute Value</label>
<input id="attributeValue" type="text" name="attributeValue"/>
<input type="submit" value="Set Attribute"/>
</form>
<hr/>
<table class="table table-striped">
<thead>
<tr>
<th>Attribute Name</th>
<th>Attribute Value</th>
</tr>
</thead>
<tbody>
<c:forEach items="${sessionScope}" var="attr">
<tr>
<td><c:out value="${attr.key}"/></td>
<td><c:out value="${attr.value}"/></td>
</tr>
</c:forEach>
</tbody>
</table>
</div>
</body>
</html>
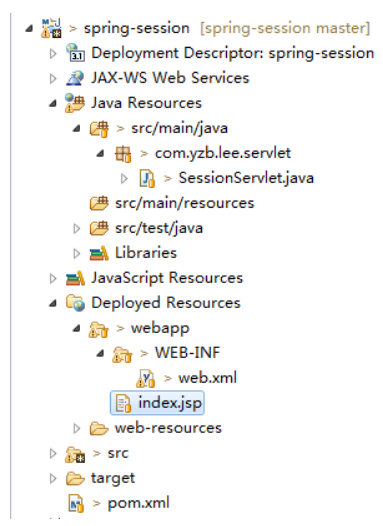
-----------------------------整个项目结构非常简单,如下如

本地运行起来,效果如下
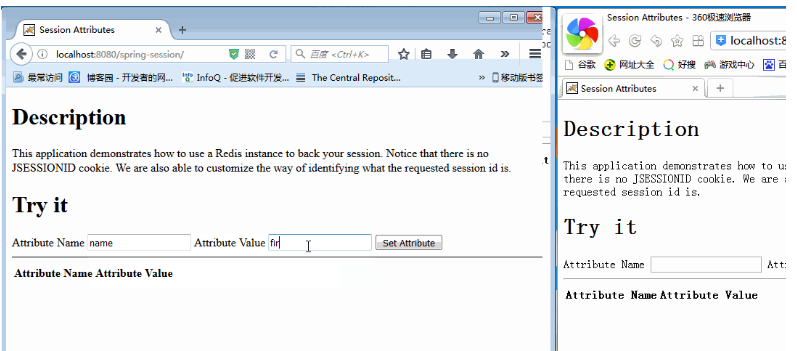
火狐浏览器与360浏览器代表不同的用户,各自都能获取各自session中的设置的全部变量,很正常,没毛病。
分布式集群应用
单机应用中,session肯定没问题,就存在本地的servlet容器中,那么在分布式集群中会像单机一样正常吗?我们接着往下看
搭建高可用的、实现负载均衡的分布式集群环境可参考nginx实现请求的负载均衡 + keepalived实现nginx的高可用,没搭建的需要先把分布式环境搭建起来
没设置ession共享
应用不变,代码与单机中的完全一致,将代码部署到分布式集群中去
全部运行起来,效果如下

结果是:无论给session设置多少个值,session中的值都获取不到(离我的预期还是有差距,具体什么差距请看我的问题)
spring-session实现session共享
应用有所变化,代码与之前有所不同,具体区别如下(SessionServlet与index.jsp不变)
pom.xml
<project xmlns="http://maven.apache.org/POM/4.0.0" xmlns:xsi="http://www.w3.org/2001/XMLSchema-instance"
    xsi:schemaLocation="http://maven.apache.org/POM/4.0.0 http://maven.apache.org/maven-v4_0_0.xsd">
    <modelVersion>4.0.0</modelVersion>
    <groupId>com.yzb.lee</groupId>
    <artifactId>spring-session</artifactId>
    <packaging>war</packaging>
    <version>0.0.1-SNAPSHOT</version>
    <name>spring-session Maven Webapp</name>
    <url>http://maven.apache.org</url>

    <properties>
        <maven.compiler.source>1.7</maven.compiler.source>
        <maven.compiler.target>1.7</maven.compiler.target>
    </properties>

    <dependencies>

        <dependency>
                <groupId>org.springframework.session</groupId>
                <artifactId>spring-session-data-redis</artifactId>
                <version>1.3.1.RELEASE</version>
                <type>pom</type>
        </dependency>
        <dependency>
                <groupId>biz.paluch.redis</groupId>
                <artifactId>lettuce</artifactId>
                <version>3.5.0.Final</version>
        </dependency>
        <dependency>
                <groupId>org.springframework</groupId>
                <artifactId>spring-web</artifactId>
                <version>4.3.4.RELEASE</version>
        </dependency>

        <dependency>
            <groupId>javax.servlet</groupId>
            <artifactId>jstl</artifactId>
            <version>1.2</version>
        </dependency>

        <dependency>
            <groupId>junit</groupId>
            <artifactId>junit</artifactId>
            <version>3.8.1</version>
            <scope>test</scope>
        </dependency>
    </dependencies>
    <build>
        <finalName>spring-session</finalName>
    </build>
</project>
-----------------------------
web.xml
<?xml version="1.0" encoding="UTF-8"?>
<web-app>
    <display-name>Archetype Created Web Application</display-name>

    <!-- spring-session config -->
    <context-param>
        <param-name>contextConfigLocation</param-name>
        <param-value>classpath*:spring-session.xml</param-value>
    </context-param>

    <!-- 这个filter 要放在第一个 -->
    <filter>
        <filter-name>springSessionRepositoryFilter</filter-name>
        <filter-class>org.springframework.web.filter.DelegatingFilterProxy</filter-class>
    </filter>
    <filter-mapping>
        <filter-name>springSessionRepositoryFilter</filter-name>
        <url-pattern>/*</url-pattern>
        <dispatcher>REQUEST</dispatcher>
        <dispatcher>ERROR</dispatcher>
    </filter-mapping>
    <listener>
        <listener-class>org.springframework.web.context.ContextLoaderListener</listener-class>
    </listener>

    <servlet>
        <servlet-name>session</servlet-name>
        <servlet-class>com.yzb.lee.servlet.SessionServlet</servlet-class>
    </servlet>
    <servlet-mapping>
        <servlet-name>session</servlet-name>
        <url-pattern>/session</url-pattern>
    </servlet-mapping>

    <welcome-file-list>
        <welcome-file>index.jsp</welcome-file>
    </welcome-file-list>
</web-app>
-------------------------
spring-session.xml
<?xml version="1.0" encoding="UTF-8"?>
<beans xmlns="http://www.springframework.org/schema/beans"
    xmlns:xsi="http://www.w3.org/2001/XMLSchema-instance" xmlns:context="http://www.springframework.org/schema/context"
    xmlns:p="http://www.springframework.org/schema/p"
    xsi:schemaLocation="http://www.springframework.org/schema/beans http://www.springframework.org/schema/beans/spring-beans.xsd
        http://www.springframework.org/schema/context http://www.springframework.org/schema/context/spring-context.xsd">

    <context:annotation-config />

    <!-- 加载properties文件 -->
    <bean id="configProperties"
        class="org.springframework.beans.factory.config.PropertyPlaceholderConfigurer">
        <property name="locations">
            <list>
                <value>classpath:session-redis.properties</value>
            </list>
        </property>
    </bean>

    <!-- RedisHttpSessionConfiguration -->
    <bean
        class="org.springframework.session.data.redis.config.annotation.web.http.RedisHttpSessionConfiguration">
        <property name="maxInactiveIntervalInSeconds" value="${redis.session.timeout}" />    <!-- session过期时间,单位是秒 -->
    </bean>

    <!--LettuceConnectionFactory -->
    <bean
        class="org.springframework.data.redis.connection.lettuce.LettuceConnectionFactory"
        p:host-name="${redis.host}" p:port="${redis.port}" p:password="${redis.pass}" />
</beans>
-------------------------------------
session-redis.properties
redis.host=192.168.0.221
redis.pass=myredis
redis.port=6379
redis.session.timeout=600
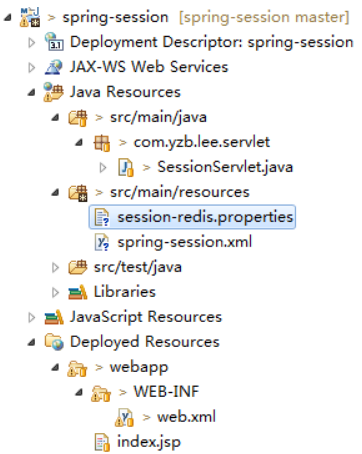
整个项目结构如下如
将代码部署到分布式集群中去,重新运行起来,效果如下
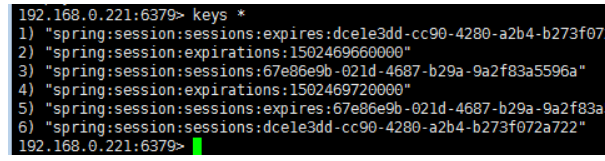
效果与单机应用的效果一样,这也就说明了session共享实现了,我们来看下redis中是否有session数据,如下图,redis中是存有session信息的
session集群
前面是用的一台redis服务器:192.168.0.221做的session服务器,只有一台的话一旦出现单点故障,那么整个session服务就没了,影响太大。为了避免出现单点故障问题,需要搭建一个session集群。搭建集群的时候,登录认证就不要打开了(requirepass注释不要打开,具体原因后续会有说明)
redis集群环境
192.168.0.221:3个节点(7000,7001,7002)
192.168.0.223:3个节点(7003,7004,7005)
redis集群搭建的过程具体可参考Redis集群搭建与简单使用
redis各个节点搭建成功之后,启动情况如下
192.168.0.221

192.168.0.223

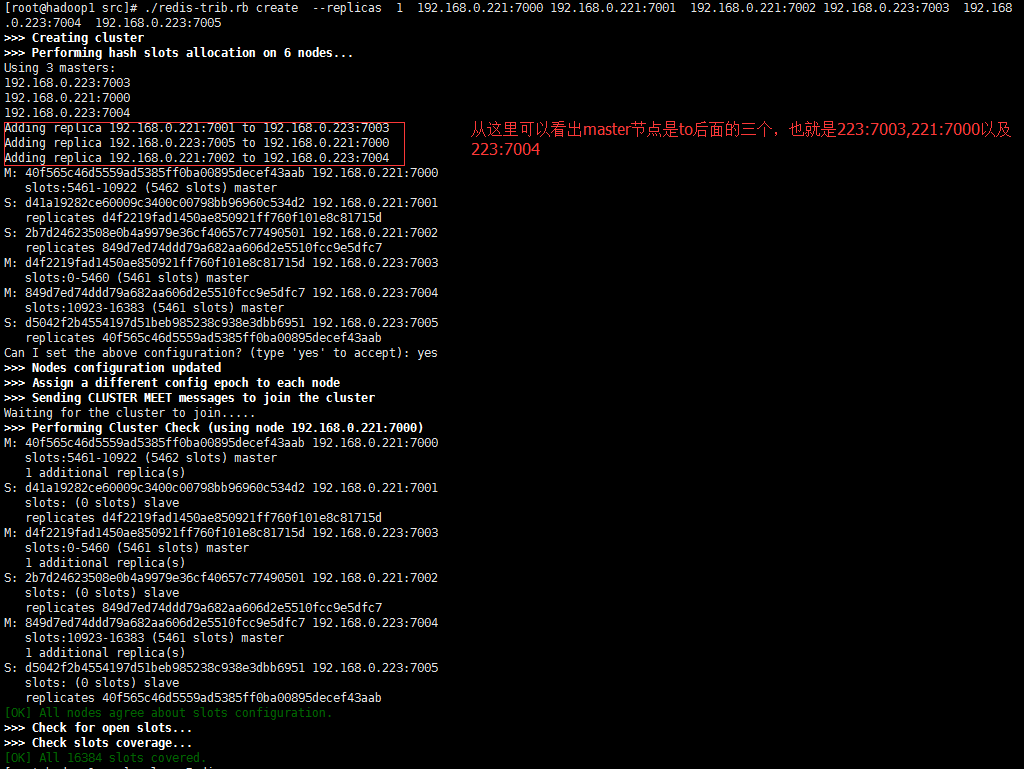
# ./redis-trib.rb create --replicas 1 192.168.0.221:7000 192.168.0.221:7001 192.168.0.221:7002 192.168.0.223:7003 192.168.0.223:7004 192.168.0.223:7005
随便在哪一台(192.168.0.221、192.168.0.223中任意一台)执行如上命令即可,若出现下图信息,则表示集群搭建成功
redis集群已经搭建好,接下来就是将redis集群应用到我们的工程中,代码是在spring-sesson实现session共享的基础上进行的,有差别的文件就只有spring-session.xml和session-redis.properties
spring-session.xml
<?xml version="1.0" encoding="UTF-8"?>
<beans xmlns="http://www.springframework.org/schema/beans"
    xmlns:xsi="http://www.w3.org/2001/XMLSchema-instance" xmlns:context="http://www.springframework.org/schema/context"
    xmlns:p="http://www.springframework.org/schema/p"
    xsi:schemaLocation="http://www.springframework.org/schema/beans http://www.springframework.org/schema/beans/spring-beans.xsd
        http://www.springframework.org/schema/context http://www.springframework.org/schema/context/spring-context.xsd">

    <context:annotation-config />

    <!-- 加载properties文件 -->
    <bean id="configProperties"
        class="org.springframework.beans.factory.config.PropertyPlaceholderConfigurer">
        <property name="locations">
            <list>
                <value>classpath:session-redis.properties</value>
            </list>
        </property>
    </bean>

    <!-- RedisHttpSessionConfiguration -->
    <bean
        class="org.springframework.session.data.redis.config.annotation.web.http.RedisHttpSessionConfiguration">
        <property name="maxInactiveIntervalInSeconds" value="${redis.session.timeout}" />    <!-- session过期时间,单位是秒 -->
    </bean>

    <!--JedisConnectionFactory -->
    <bean class="org.springframework.data.redis.connection.jedis.JedisConnectionFactory">
        <constructor-arg>
            <!--redisCluster配置-->
            <bean class="org.springframework.data.redis.connection.RedisClusterConfiguration">
                <constructor-arg>
                    <list>
                        <value>${redis.master1}</value>
                        <value>${redis.master2}</value>
                        <value>${redis.master3}</value>
                    </list>
                </constructor-arg>
            </bean>
        </constructor-arg>
    </bean>

    <!--LettuceConnectionFactory -->
    <!-- 单节点redis -->
    <!-- <bean
        class="org.springframework.data.redis.connection.lettuce.LettuceConnectionFactory"
        p:host-name="${redis.host}" p:port="${redis.port}" p:password="${redis.pass}" /> -->
</beans>

------------------------------
session-redis.properties
#redis.host=192.168.0.221
#redis.pass=myredis
#redis.port=6379
redis.master1=192.168.0.221:7000
redis.master2=192.168.0.223:7003
redis.master3=192.168.0.223:7004
redis.session.timeout=600
据我亲测,效果与单节点redis的效果是一样的,我就不放效果图了,但是大家最好还是去亲测一下。
工程地址:spring-session
注意点
1、单机应用中,HttpSession是通过Servlet容器创建和管理的,servlet容器一旦停止服务,那么session也随之消失;但如果session被保存到redis中,只要redis服务没停且session在有效期间内,那么servlet容器停止服务了,session还是存在的,这有什么好处了,好处就是servlet容器出现闪停闪修复的情况,用户就不用重新登录了。
2、spring中的ContextLoaderListener与DispatcherServlet不知道大家了解不,严格的来讲这两者负责加载的bean是有区别的,也最好设置成加载不同的bean,不然可能会发生一些你意想不到的情况。不知道区别的可以去阅读浅谈ContextLoaderListener及其上下文与DispatcherServlet的区别。
3、测试的时候可以从底往高进行测试,也就是说先测试tomcat,再测试nginx,最后测试VIP。
4、redis中可以手动删除session,不一定非要等到session过期。
5、分布式测试的时候,最好在index.jsp加一些标记(例如ip,就写死成index.jsp所在服务器的ip),用来区分不同的服务器,那样测试起来更加明显。
6、spring-session官网提供的例子中,用注解的方式进行配置的,可我压根就没看到web.xml中有spring的配置,但实际上spring容器启动了,并且实例化了需要的bean,应用也能跑起来,这让我很是费解,spring容器是什么时候初始化的? 这其实是servlet3.0的新特性,servlet3.0开始支持无web.xml的注解配置方式,而AbstractHttpSessionApplicationInitializer(AbstractHttpSessionApplicationInitializer implements WebApplicationInitializer)就是接入点(就如在web.xml中配置spring一样),更多的详细信息需要大家去查阅资料了。
7、设置redis集群的时候,若设置了密码登录(将redis.conf中requirepass打开并设置了自己的密码),那么执行# ./redis-trib.rb create --replicas 1 192.168.0.221:7000 192.168.0.221:7001 192.168.0.221:7002 192.168.0.223:7003 192.168.0.223:7004 192.168.0.223:7005的时候会提示[ERR] Sorry, can't connect to node 192.168.0.221:7000,那么需要将/usr/lib/ruby/gems/1.8/gems/redis-3.3.0/lib/redis/client.rb中的password改成自己的密码即可,当然了,redis的所有实例的密码要一致,或者说全部的redis.conf中密码设置的值要一样,修改/usr/lib/ruby/gems/1.8/gems/redis-3.3.0/lib/redis/client.rb如下
vim /usr/lib/ruby/gems/1.8/gems/redis-3.3.0/lib/redis/client.rb
将client.rb中的password改成自己设置的redis密码
class Redis
  class Client

    DEFAULTS = {
      :url => lambda { ENV["REDIS_URL"] },
      :scheme => "redis",
      :host => "127.0.0.1",
      :port => 6379,
      :path => nil,
      :timeout => 5.0,
      :password => "myredis",    #改成自己的密码
      :db => 0,
      :driver => nil,
      :id => nil,
      :tcp_keepalive => 0,
      :reconnect_attempts => 1,
      :inherit_socket => false
    }
之前说过,利用redis集群来存储session的时候,登录认证不要打开,因为jedis好像还不支持redis的集群密码设置。
问题
1、分布式集群的没设置session共享的情况中,为什么设置进去的值一个都获取不到,按我的理解应该是每次返回回来的数据应该是某个tomcat上的session中的数据,当设置的值多了后,每次都应该有值返回,而测试得到的结果却是无论你设置多少值,没有任何值返回回来,这里没搞清楚原因。
2、jedis这么设置集群密码,目前还不知道,知道的请留个言; 或者知道lettuce怎么设置redis集群和集群密码的也可以留个言;再或者有其他方式的也可以留个言; 在此表示感谢了!
来源:https://www.cnblogs.com/youzhibing/p/7348337.html


方便程序控制–总结系统排查错误的方法等")

