开放平台介绍
什么是开放平台
开放平台在百科中的定义:
开放平台(Open Platform) 在软件行业和网络中,开放平台是指软件系统通过公开其应用程序编程接口(API)或函数(function)来使外部的程序可以增加该软件系统的功能或使用该软件系统的资源,而不需要更改该软件系统的源代码。
通俗或者说应景点的说法,开放平台,就是互联网企业,将其内部的资源(一般是数据),比如用户数据,平台业务数据,以技术的手段(一般是RESTFul接口API),开放给受控的第三方合作伙伴,活公司内部的其它一些产品,形成一个安全受控的资源暴露平台。
为什么要搭建开放平台
搭建开放平台的意义,一般在于:
1.搭建基于API的生态体系
2.利用开放平台,搭建基于计费的API数据平台
3.为APP端提供统一接口管控平台,类似于网关的概念
4.为第三方合作伙伴的业务对接提供授信可控的技术对接平台
开放平台体系结构图

开放平台核心模块
一个典型的开放平台,至少包含以下几个核心模块:
1.平台门户
平台门户负责向第三方展示用于进行业务及技术集成的管理界面,至少包含以下几个功能:
1.服务商入住(第三方合作伙伴入住)
2.应用配置(第三方应用管理)
3.权限申请(一般包括接口权限和字段权限)
4.运维中心(开放平台当前服务器、接口状态,服务商接口告警等)
5.帮助中心(入住流程说明,快速接入说明,API文档等)
2.鉴权服务
鉴权服务负责整个平台的安全性
1.接口调用鉴权(第三方合作伙伴是否有权限调用某接口)
2.用户授权管理(用户对某个第三方应用获取改用户信息的权限管理)
3.用户鉴权(平台用户的鉴权)
4.应用鉴权(第三方合作伙伴的应用是否有权调用该平台)
3.开放接口
开放接口用于将平台数据暴露给合作伙伴
1.平台用户接口(用于获取公司APP生态链中的用户信息)
2.平台数据接口(平台中的一些开放数据)
3.其它业务接口(平台开放的一些业务数据)
4.运营系统
运营系统是整个平台的后台业务管理系统,负责对第三方合作伙伴提出的各种申请进行审核操作,对当前应用的操作进行审计工作,对当前业务健康度进行监控等
1.服务商管理(对第三方合作伙伴的资质进行审核、操作)
2.应用管理(对第三方应用进行审核、上下线管理)
3.权限管理(对合作伙伴申请的资源进行审核、操作)
4.统计分析(监控平台当前运行状态,统计平台业务数据)
OAuth2介绍
什么是OAuth2
百科:OAUTH协议为用户资源的授权提供了一个安全的、开放而又简易的标准。与以往的授权方式不同之处是OAUTH的授权不会使第三方触及到用户的帐号信息(如用户名与密码),即第三方无需使用用户的用户名与密码就可以申请获得该用户资源的授权,因此OAUTH是安全的。oAuth是Open Authorization的简写。
简单来说:OAuth2协议,定义了一套用户、第三方服务和存储着用户数据的平台之间的交互规则,可以使得用户无需将自己的用户名和密码暴露给第三方,即可使第三方应用获取用户在该平台上的数据,最常见的场景便是现在互联网上的各种使用XXX账号登录。
OAuth2协议中角色介绍
OAuth2协议中,共有四个参与方(角色):
1.resource owner:资源拥有者
即用户
2.resource server:资源服务器
即存储用户数据的服务器,一般对外都以RESTFul API的形式暴露用户数据,client使用access token访问resource server申请被保护起来的用户数据
3.client:客户端
即第三方应用
4.authorization server:授权服务器
用来鉴权第三方应用合法性,并对用户登录、是否授权第三方应用获取数据进行响应,并根据用户操作,想第三应用颁发用户token或者告知授权失败
OAuth2常用协议介绍
OAUTH2标准业务协议,如下图所示

A.第三方应用向用户请求授权,希望获取用户数据
B.用户同意授权
C.第三方应用拿着用户授权,向平台索要用户access token
D.平台校验第三应用合法性及用户授权真实性后,向平台发放用户access token
E.第三方应用拿着用户access token向平台索要用户数据
F.平台在校验用户access token真实性后,返回用户数据
各个角色之间的关系,可以通过国外网站介绍了解一下, 如下
OAuth 2.0 defines the following roles of users and applications:
- Resource Owner
- Resource Server
- Client Application
- Authorization Server
These roles are illustrated in this diagram:
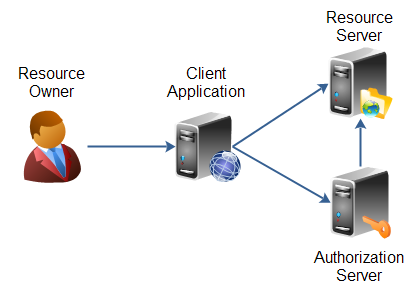 |
| OAuth 2.0 roles as defined in the specification. |
The resource owner is the person or application that owns the data that is to be shared. For instance, a user on Facebook or Google could be a resource owner. The resource they own is their data. The resource owner is depicted in the diagram as a person, which is probably the most common situation. The resource owner could also be an application. The OAuth 2.0 specification mentions both possibilities.
The resource server is the server hosting the resources. For instance, Facebook or Google is a resource server (or has a resource server).
The client application is the application requesting access to the resources stored on the resource server. The resources, which are owned by the resource owner. A client application could be a game requesting access to a users Facebook account.
The authorization server is the server authorizing the client app to access the resources of the resource owner. The authorization server and the resource server can be the same server, but it doesn’t have to. The OAuth 2.0 specification does not say anything about how these two servers should communicate, if they are separate. This is an internal design decision to be made by the resource server + authorization server developers.
上述内容来源:http://tutorials.jenkov.com/oauth2/roles.html
OAuth2使用场景介绍
目前,OAuth2协议使用最多的场景还是用以给第三方应用获取用户信息,业务流程如下图所示

1.在浏览器中,用户点击第三方应用按钮,由第三方应用发起请求,向平台发起授权请求。
2.平台在接收到第三方应用请求后,浏览器跳转用户登录界面,请求用户进行登录。
3.用户在平台登录界面输入用户名、密码进行登录
4.平台判断用户合法性,校验失败,在浏览器中提示错误原因
5.平台判断用户是否需要对该第三方应用进行授权。(不需要授权的情况有两种:a.平台信任该第三方应用,如公司内部应用,无需用户进行授权,默认给予用户数据。b.该用户之前已经给该应用授予过权限,并且仍在有效期内)
6.如需授权,平台跳转浏览器界面至授权界面,告知用户将授予哪个第三方哪些数据权限
7.用户授权后,将用户授权码回调给第三方url
8.第三方在获取用户授权码后,带着用户授权码访问平台鉴权接口,请求用户token
9.平台在收到第三方请求后,校验授权码真实性,并返回用户token
10.第三方使用用户token向平台请求用户接口
11.平台接口判断用户token真实性,并向第三方返回用户数据
OAuth2核心功能说明
1.应用注册
应用注册后,OAuth2会下发应用app_id和app_secret,用以标记该应用的唯一性,并且这两个参数将贯穿整个OAuth协议,用以对应用合法性进行校验。同时,应用需要提供redirect_uri,用以和平台进行异步交互,获取用户令牌及错误信息。
2.授权/鉴权中心
a.对用户的应户名、密码进行鉴权
b.对第三方应用的app_id,app_secret进行鉴权
c.展示授权界面,并对用户对第三方应用的授权操作进行响应
d.对用户授权码及用户token的真实性进行鉴权
3.token管理
a.创建token、刷新token
b.查询token详细数据
c.校验token时效性
OAuth2体系结构

开放平台集成OAuth2体系
1.平台门户:
门户应用入住界面,需要集成OAuth2应用创建接口,录入第三方回调地址,并回显app_id和app_secret参数
2.鉴权服务:
鉴权服务需集成OAuth2的authorize及token接口,用以提供用户授权及code/token鉴权功能
3.开放接口:
开放接口需集成OAuth2的resource server角色,对用户数据进行安全管理,对第三方应用发起的请求做出响应,并对token进行真实性校验
4.运营系统:
运营系统需提供对当前OAuth2应用的管理功能,用户授权列表管理,用户token管理等OAuth2协议相关管理功能。
另外, oauth2.0 有很多类型, 如下
OAuth 2.0 Client Types
| Jakob Jenkov Last update: 2014-06-15 |
The OAuth 2.0 client role is subdivided into a set of client types and profiles. This text will explain these types and profiles.
The OAuth 2.0 specification defines two types of clients:
- Confidential
- Public
A confidential client is an application that is capable of keeping a client password confidential to the world. This client password is assigned to the client app by the authorization server. This password is used to identify the client to the authorization server, to avoid fraud. An example of a confidential client could be a web app, where no one but the administrator can get access to the server, and see the client password.
A public client is an application that is not capable of keeping a client password confidential. For instance, a mobile phone application or a desktop application that has the client password embedded inside it. Such an application could get cracked, and this could reveal the password. The same is true for a JavaScript application running in the users browser. The user could use a JavaScript debugger to look into the application, and see the client password.
Client Profiles
The OAuth 2.0 specification also mentions a set of client profiles. These profiles are concrete types of applications, that can be either confidential or public. The profiles are:
- Web Application
- User Agent
- Native
Web Application
A web application is an application running on a web server. In reality, a web application typically consists of both a browser part and a server part. If a web application needs access to a resource server (e.g. to Facebook user accounts), then the client password could be stored on the server. The password would thus be confidential.
Here is an illustration of a confidential client web application:
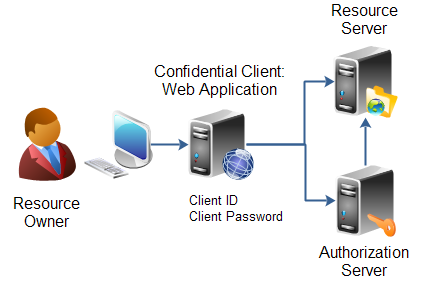 |
| Confidential client: Web Application. |
User Agent Application
A user agent application is for instance a JavaScript application running in a browser. The browser is the user agent. A user agent application may be stored on a web server, but the application is only running in the user agent once downloaded. An example could be a little JavaScript game that only runs in the browser.
Here is an illustration of a client user agent application:
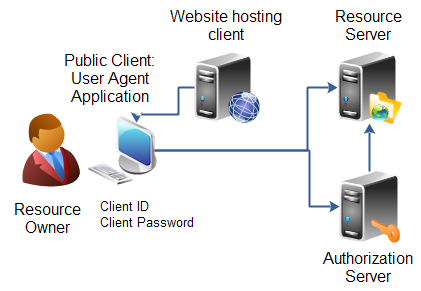 |
| Public client: User Agent Application. |
Native Application
A native application is for instance a desktop application or a mobile phone application. Native applications are typically installed on the users computer or device (phone, tablet etc.). Thus, the client password will be stored on the users computer or device too.
Here is an illustration of a client native application:
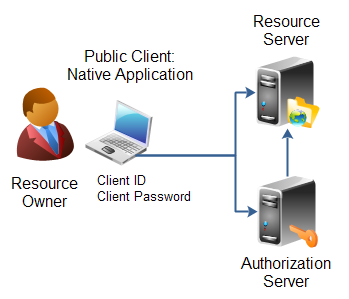 |
| Public client: Native Application. |
Hybrid Applications
Some applications are hybrids of these profiles. For instance, a native application can have a server part too, that does part of the work (e.g. store data). The OAuth 2.0 specification says nothing about such hybrids. However, in most cases a hybrid will be able to use the authentication models of one of these profiles.
上述资料内容来源: http://tutorials.jenkov.com/oauth2/client-types.html
SSO介绍
什么是SSO
百科:SSO英文全称Single Sign On,单点登录。SSO是在多个应用系统中,用户只需要登录一次就可以访问所有相互信任的应用系统。它包括可以将这次主要的登录映射到其他应用中用于同一个用户的登录的机制。它是目前比较流行的企业业务整合的解决方案之一。
简单来说,SSO出现的目的在于解决同一产品体系中,多应用共享用户session的需求。SSO通过将用户登录信息映射到浏览器cookie中,解决其它应用免登获取用户session的问题。
为什么需要SSO
开放平台业务本身不需要SSO,但是如果平台的普通用户也可以在申请后成为一个应用开发者,那么就需要将平台加入到公司的整体账号体系中去,另外,对于企业级场景来说,一般都会有SSO系统,充当统一的账号校验入口。
CAS协议中概念介绍
SSO单点登录只是一个方案,而目前市面上最流行的单端登录系统是由耶鲁大学开发的CAS系统,而由其实现的CAS协议,也成为目前SSO协议中的既定协议,下文中的单点登录协议及结构,均为CAS中的体现结构
CAS协议中有以下几个概念:
1.CAS Client:需要集成单点登录的应用,称为单点登录客户端
2.CAS Server:单点登录服务器,用户登录鉴权、凭证下发及校验等操作
3.TGT:ticker granting ticket,用户凭证票据,用以标记用户凭证,用户在单点登录系统中登录一次后,再其有效期内,TGT即代表用户凭证,用户在其它client中无需再进行二次登录操作,即可共享单点登录系统中的已登录用户信息
4.ST:service ticket,服务票据,服务可以理解为客户端应用的一个业务模块,体现为客户端回调url,CAS用以进行服务权限校验,即CAS可以对接入的客户端进行管控
5.TGC:ticket granting cookie,存储用户票据的cookie,即用户登录凭证最终映射的cookies
CAS核心协议介绍

1.用户在浏览器中访问应用
2.应用发现需要索要用户信息,跳转至SSO服务器
3.SSO服务器向用户展示登录界面,用户进行登录操作,SSO服务器进行用户校验后,映射出TGC
4.SSO服务器向回调应用服务url,返回ST
5.应用去SSO服务器校验ST权限及合法性
6.SSO服务器校验成功后,返回用户信息
CAS基本流程介绍
以下为基本的CAS协议流程,图一为初次登录时的流程,图二为已进行过一次登录后的流程


代码及示例
spring提供了整套的开源包,用以搭建OAUTH2+SSO的体系:
1.spring-oauth2:用以实现OAuth2协议,提供了上述所有四个角色提供的功能
2.spring-cas:用以实现和cas的集成,将OAuth2的登录、登出功能委托给CAS处理,并提供了统一的回调机制及凭证校验机制
3.CAS,耶鲁大学官方提供的SSO开源实现,本文的单点登录协议即按照CAS进行的说明
本文还提供了基于GO语言实现的简单OAuth2+SSO功能,详见github:
https://github.com/janwenjohn/go-oauth2-sso
原创文章,转载或摘录请说明文章来源:http://heartlifes.com
-----
下面是一个很好的 关于cas的 文章再录如下:
对的,PORTAL里一定含有SSO,在此先提一下。
下面是一些著名的调查公司显示的统计数据:
- 用户每天平均16分钟花在身份验证任务上 - 资料来源:IDS
- 频繁的IT用户平均有21个密码 - 资料来源:NTA Monitor Password Survey
- 49%的人写下了其密码,而67%的人很少改变它们
- 每79秒出现一起身份被窃事件 - 资料来源:National Small Business Travel Assoc
- 全球欺骗损失每年约12B - 资料来源:Comm Fraud Control Assoc
使用“单点登录”整合后,只需要登录一次就可以进入多个系统,而不需要重新登录,这不仅仅带来了更好的用户体验,更重要的是降低了安全的风险和管理的消耗。
请看下面的统计数据:
- 提高IT效率:对于每1000个受管用户,每用户可节省$70K
- 帮助台呼叫减少至少1/3,对于10K员工的公司,每年可以节省每用户$75,或者合计$648K
- 生产力提高:每个新员工可节省$1K,每个老员工可节省$350 - 资料来源:Giga
- ROI回报:7.5到13个月 - 资料来源:Gartner
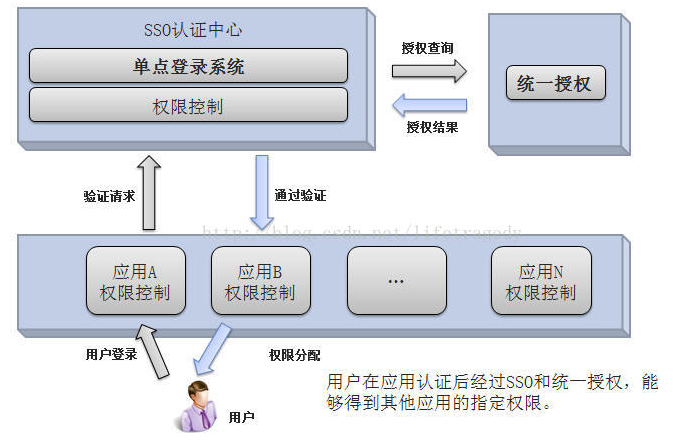
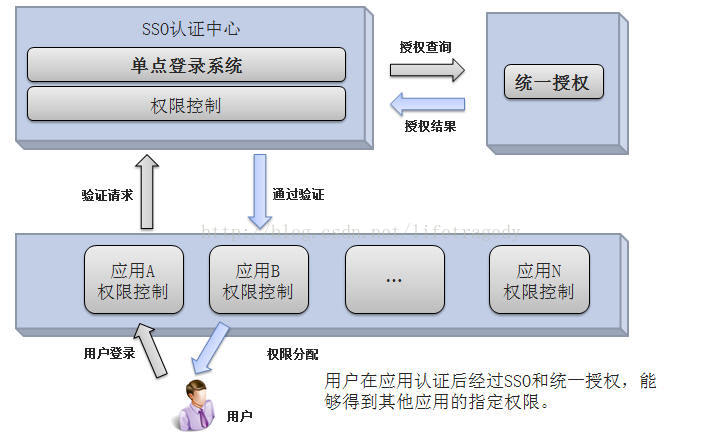
另外,使用“单点登录”还是SOA时代的需求之一。在面向服务的架构中,服务和服务之间,程序和程序之间的通讯大量存在,服务之间的安全认证是SOA应用的难点之一,应此建立“单点登录”的系统体系能够大大简化SOA的安全问题,提高服务之间的合作效率。
以下是一个标准的企业内通过SSO来集成各个系统间的认证与权限的模型图
好了,以上基本知识普及完毕开始我们的SSO实现。
CAS SSO
SSO实现有很多产品,我们今天选用的这个是耶鲁大学发明的CAS SSO服务器。这个CAS SSO是目前我看到过的功能较全的,使用也是最简单的配置式SSO服务器,它基于SPRING的原理,因此这个配置文件我们看起来因当是相当的熟悉的。
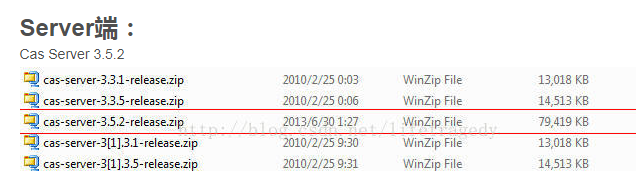
它分为Server版和Client版2个模块,同时它对于一些其它功能特性如:数据库、LDAP协议(就是WINDOWS AD域使用的协议)、安全等还提供了一系列的插件。因此,在本例中,我使用的是:


注
请严格按照我的版本号进行试验。
什么叫Server端 ,什么叫Client端?
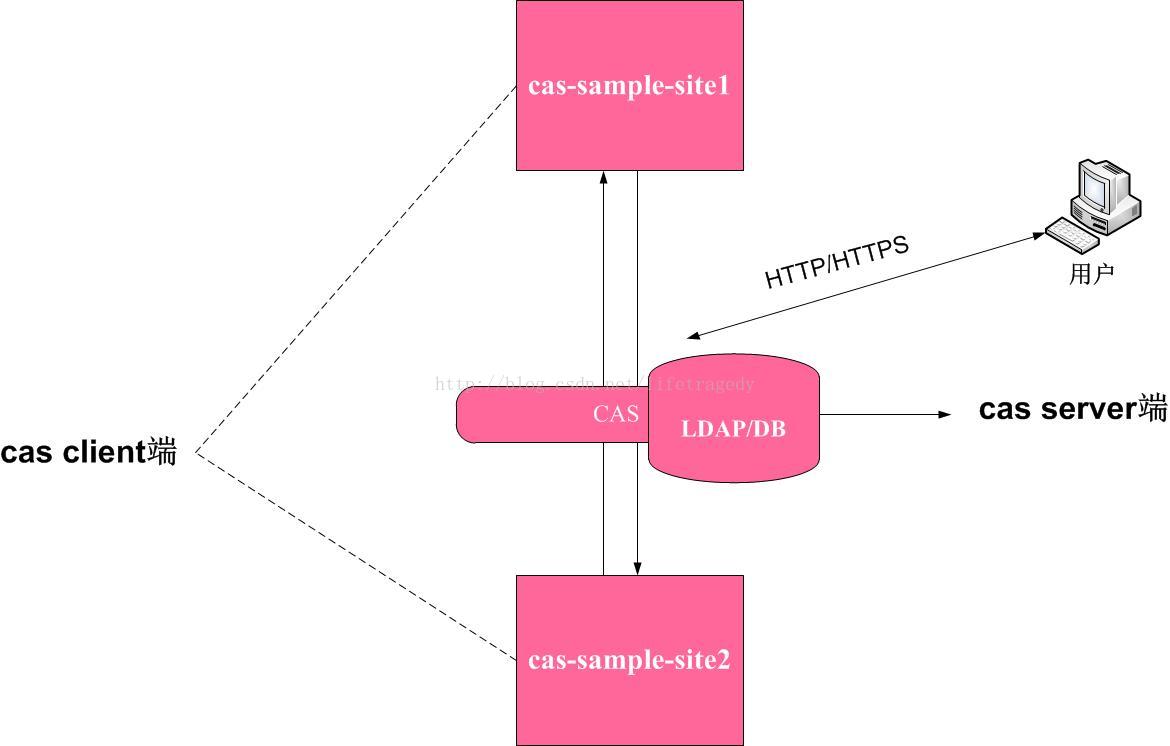
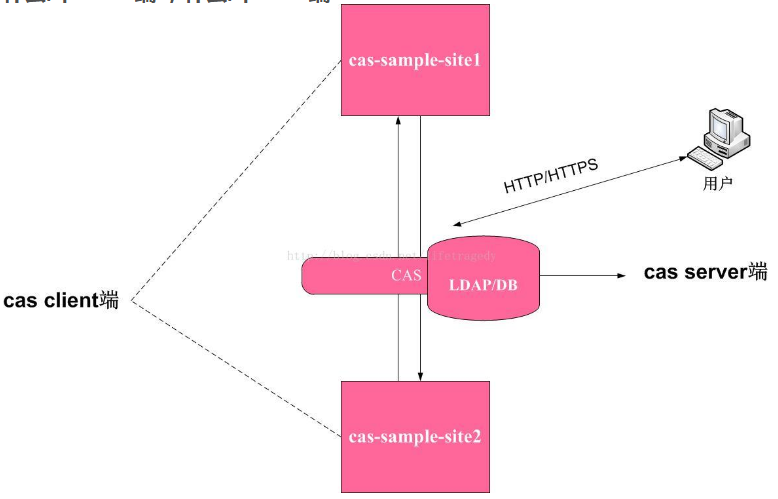
- 一个叫cas-server.war,它放在tomcat里;
- 一个叫cas-sample-site1.war,它放在jboss里;
- 一个叫cas-sample-site2.war,它放在jboss里;
布署cas-server
| 版本号 | web端口 | |
| tomcat | 6 | 9090 |
| jboss | 7 | 8080 |
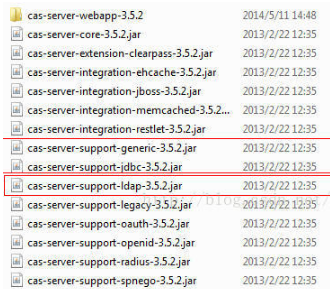
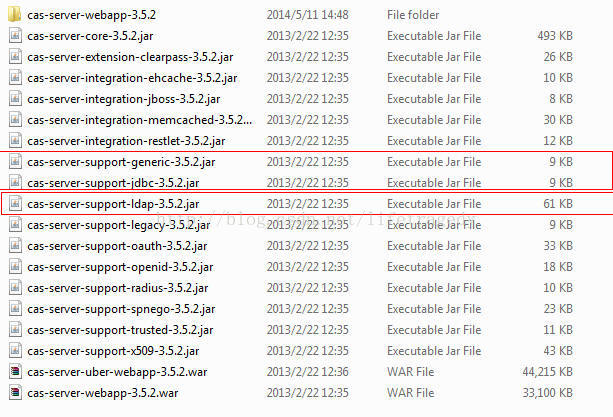
它里面含了一堆的东西,关键在于以下这个文件夹
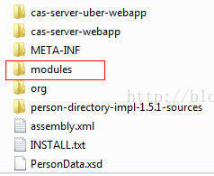
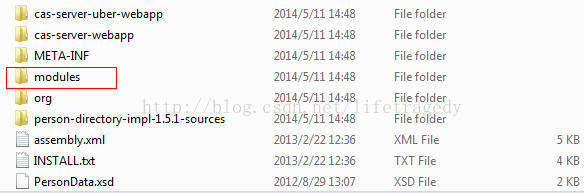
进入该文件夹,找到这样一个war包。
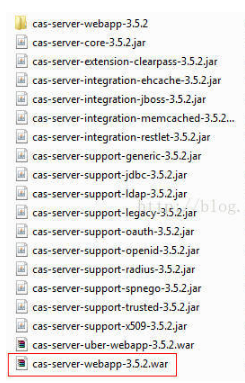
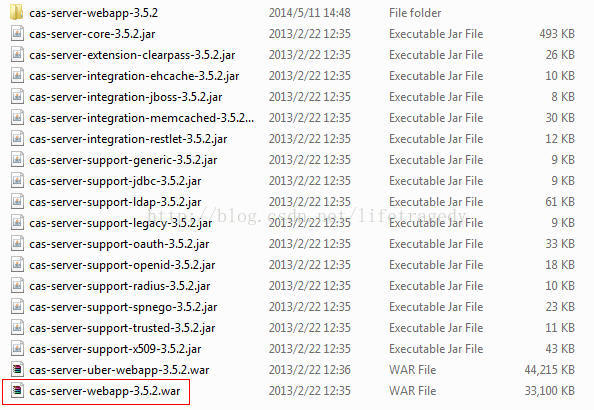
把这个war包解压后重命名成cas-server.war,放于tomcat的webapp目录中去,启动tomcat一切无误后即可。
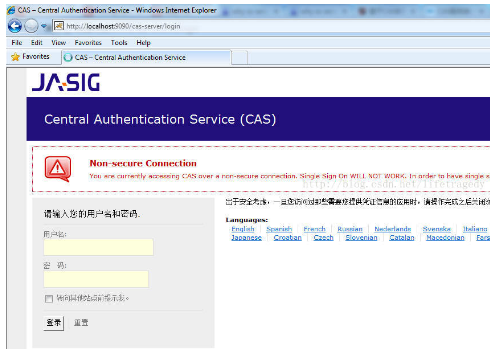
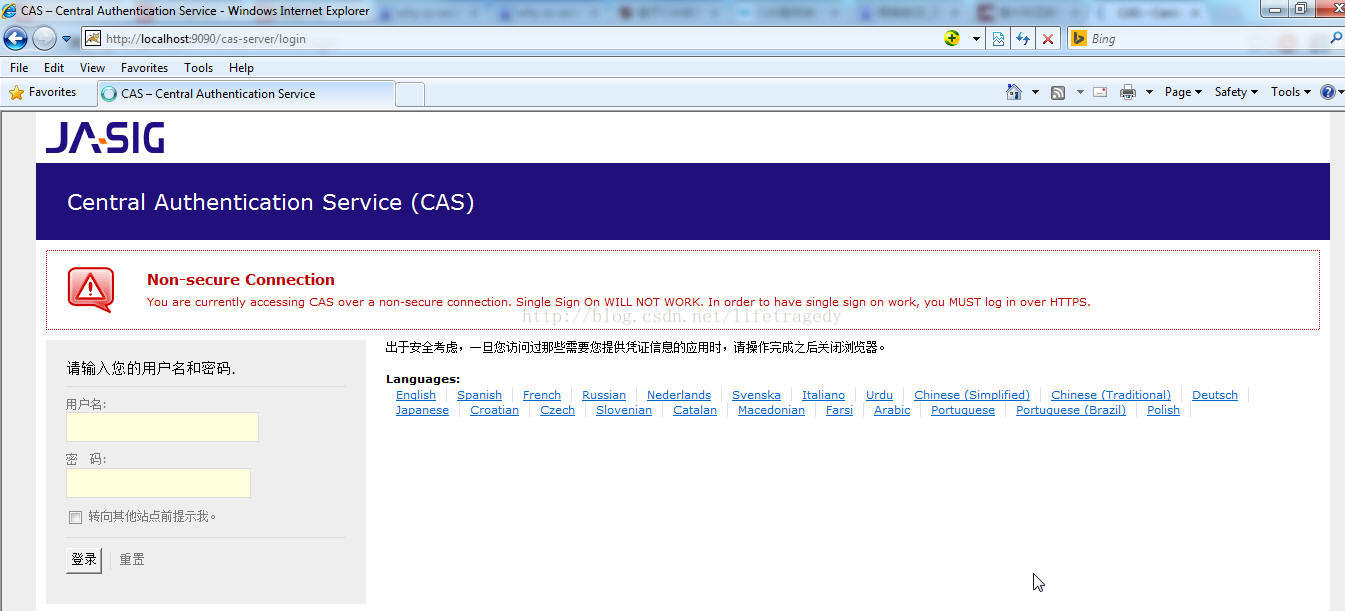
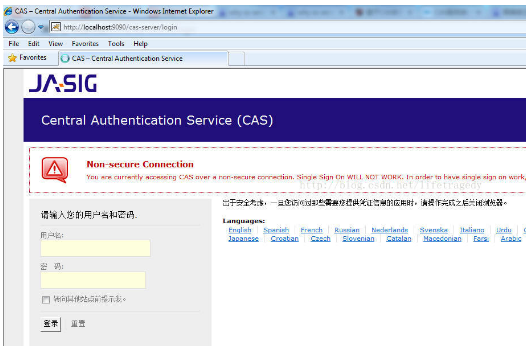
然后我们打开一个ie,输入http://localhost:9090/cas-server会得到以下这个界面,那就说明你的cas sso已经安装成功了。
配置CAS SERVER
添加依赖包
在本例中我们将使用Oracle数据库中自建一个用户表来管理我们的用户名和密码,因此:
- 将oracle的ojdbc6.jar放入tomcat的lib目录内D:\tomcat\lib
- 将cas-server-3.5.2-release\cas-server-3.5.2\modules下的这几个文件拷入tomcat\webapp\cas-server\web-inf\lib目录内
修改配置文件
CAS SSO的好处在于它的配置文件是完全spring的,你只要懂spring就可以非常容易的在里面去添加修改自己的一些功能,我们在第一天的教程中为了尽量简单,我们只需要改动一个文件,它就是:
tomcat\webapps\cas-server\WEB-INF目录下的
deployerConfigContext.xml文件
我们用纯文件编辑器打开它,找到下面这行:<bean class="org.jasig.cas.authentication.handler.support.SimpleTestUsernamePasswordAuthenticationHandler" />
把它注释掉
<!--
<bean class="org.jasig.cas.authentication.handler.support.SimpleTestUsernamePasswordAuthenticationHandler" />
-->
然后再在它下面添加如下内容
<!--
   <bean class="org.jasig.cas.authentication.handler.support.SimpleTestUsernamePasswordAuthenticationHandler" />
-->
<bean class="org.jasig.cas.adaptors.jdbc.QueryDatabaseAuthenticationHandler">
      <property name="dataSource" ref="dataSource" ></property>
      <property name="sql" value="select password from sys_user where user_id=?" ></property>
</bean>
好,这边我们看到了一个dataSource对吧,EASY,来。。。
<!--
          <bean class="org.jasig.cas.authentication.handler.support.SimpleTestUsernamePasswordAuthenticationHandler" />
-->
          <bean class="org.jasig.cas.adaptors.jdbc.QueryDatabaseAuthenticationHandler">
            <property name="dataSource" ref="dataSource" ></property>
            <property name="sql" value="select password from sys_user where user_id=?" ></property>
          </bean>
    </list>
</property>
</bean>

<bean id="dataSource"
    class="org.springframework.jdbc.datasource.DriverManagerDataSource">
    <property name="driverClassName" value="oracle.jdbc.OracleDriver" />
    <property name="url" value="jdbc:oracle:thin:@localhost:1521:orcl" />
    <property name="username" value="ymk" />
    <property name="password" value="password_1" />
</bean>
注意我加的这个dataSource的bean和刚才那段配置代码之间的位置对应关系哦,别胡乱搞一个回车就乱加一行哦。
全加完了,怎么样啦?完成了吗?
还没,CAS SSO严格意义上来说需要J2EE APP SERVER里实现HTTPS即SSL的双向认证模式才能正常使用,但是我们因为这个是教程,因此不想搞了太麻烦,我们可以在“不使用HTTPS认证”的情况下也可以使用CAS SSO。
为此,我们要关闭CAS SSO的HTTPS认证模式,编辑:
tomcat\webapps\cas-server\WEB-INF\spring-configuration目录下的
ticketGrantingTicketCookieGenerator.xml文件
找到下面这行
- <bean id="ticketGrantingTicketCookieGenerator" class="org.jasig.cas.web.support.CookieRetrievingCookieGenerator"
- p:cookieSecure="true"
- p:cookieMaxAge="-1"
- p:cookieName="CASTGC"
- p:cookiePath="/cas" />
- </beans>
把这边的p:cookieSecure从true改为false即可。
然后我们在oracle中建一个用户表吧,建表语句如下:
- CREATE TABLE SYS_USER
- (
- "USER_ID" VARCHAR2(16),
- "PASSWORD" VARCHAR2(8),
- CONSTRAINT "PK_SYS_USER" PRIMARY KEY ("USER_ID")
- );
该表中含有一条记录:
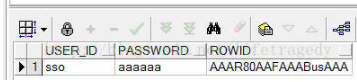
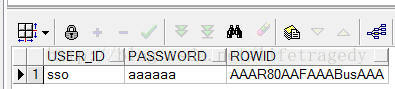
这就是我们的用于测试的单点登录的用户名和密码了,很简单吧?
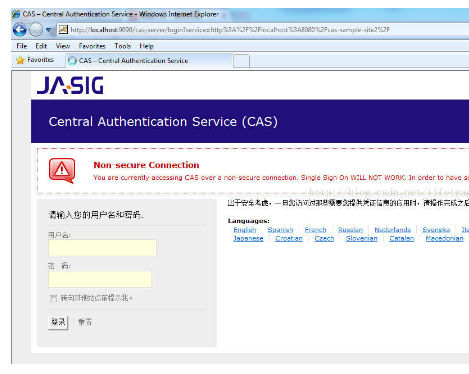
全部保存后,重启tomcat,一切无误,然后我们打开一个ie,输入http://localhost:9090/cas-server会得到以下这个界面,那就说明你的cas sso已经安装成功了。
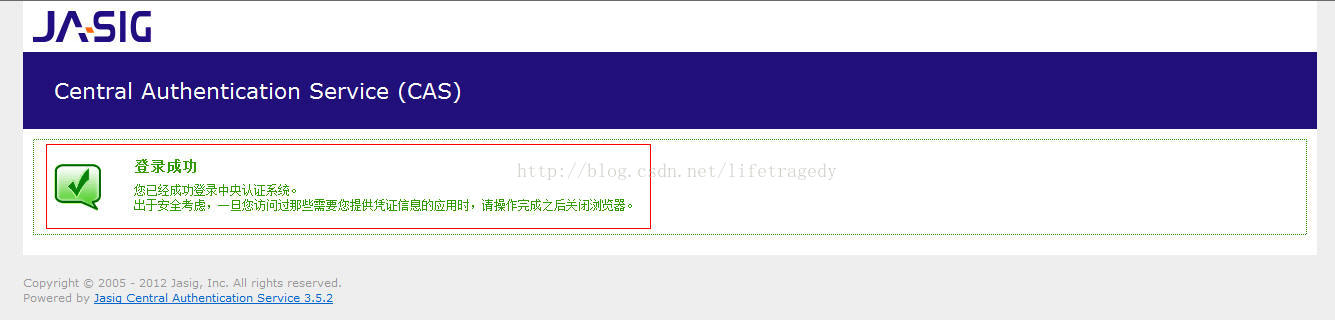
我们在用户名中输入sso, 在密码一栏中输入aaaaaa,然后看到下面这个界面,即代表我们的cas server和我们的数据库已经完全连上了。
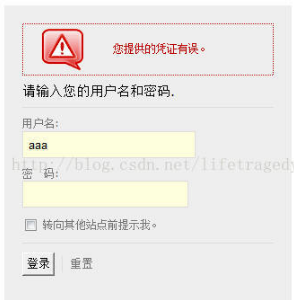
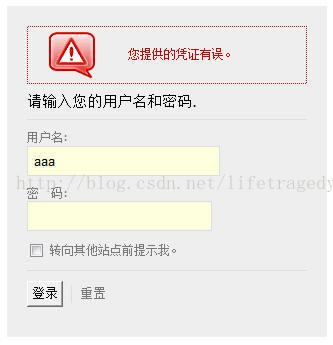
如果我们不按照sys_user表中的用户名和密码就随意输入用户名和密码,那我们便会得到这样的结果:
将不同的工程连接上cas server以实现单点登录
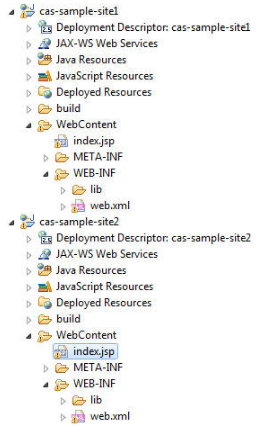
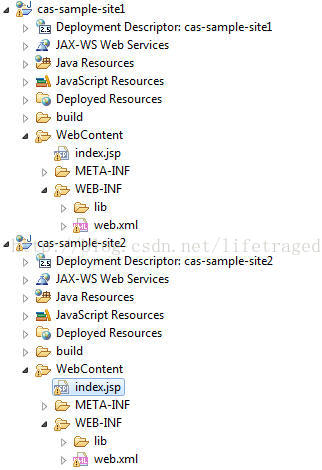
按照这个图,我们将会有2个不同的war包
- 一个叫cas-sample-site1.war,它放在jboss里;
- 一个叫cas-sample-site2.war,它放在jboss里;
我们在我们的eclipse里创建两个这样的war工程即可,这是非常简单的事,这2个工程都含有一个index.jsp文件。
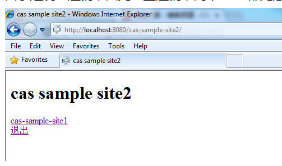
cas-sample-site1
在它的index.jsp文件中含有如下内容:
- <%@ page language="java" contentType="text/html; charset=utf-8"
- pageEncoding="utf-8"%>
- <!DOCTYPE html PUBLIC "-//W3C//DTD HTML 4.01 Transitional//EN" "http://www.w3.org/TR/html4/loose.dtd">
- <html>
- <head>
- <meta http-equiv="Content-Type" content="text/html; charset=utf-8">
- <title>cas sample site1</title>
- </head>
- <body>
- <h1>cas sample site1</h1>
- <a href="http://localhost:8080/cas-sample-site2/index.jsp">cas-sample-site2</a>
- </br>
- <a href="http://localhost:9090/cas-server/logout">退出</a>
- </body>
- </html>
cas-sample-site2
在它的index.jsp文件中含有如下内容:
- <%@ page language="java" contentType="text/html; charset=utf-8"
- pageEncoding="utf-8"%>
- <!DOCTYPE html PUBLIC "-//W3C//DTD HTML 4.01 Transitional//EN" "http://www.w3.org/TR/html4/loose.dtd">
- <html>
- <head>
- <meta http-equiv="Content-Type" content="text/html; charset=utf-8">
- <title>cas sample site2</title>
- </head>
- <body>
- <h1>cas sample site2</h1>
- <a href="http://localhost:8080/cas-sample-site1/index.jsp">cas-sample-site1</a>
- </br>
- <a href="http://localhost:9090/cas-server/logout">退出</a>
- </body>
- </html>
这两个war工程都有一个lib目录,确保它们的lib目录里都有这样几个jar
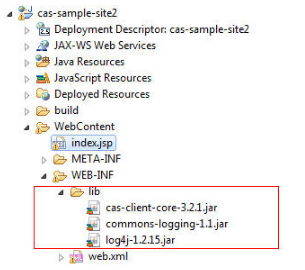
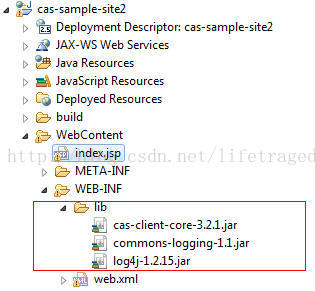
look, 注意要有cas-client-core-3.2.1.jar哦,它来自于:cas-client-3.2.1-release\cas-client-3.2.1\modules即cas-client-3.2.1-release.zip解压出来的内容。
这两个工程的web.xml可以说是完全一模一样,我们来看:
<?xml version="1.0" encoding="UTF-8"?>
<web-app xmlns:xsi="http://www.w3.org/2001/XMLSchema-instance" xmlns="http://java.sun.com/xml/ns/javaee" xmlns:web="http://java.sun.com/xml/ns/javaee/web-app_2_5.xsd" xsi:schemaLocation="http://java.sun.com/xml/ns/javaee http://java.sun.com/xml/ns/javaee/web-app_2_5.xsd" id="WebApp_ID" version="2.5">
  <display-name>cas-sample-site2</display-name>
  <welcome-file-list>
    <welcome-file>index.jsp</welcome-file>
    <welcome-file>index.html</welcome-file>
    <welcome-file>index.htm</welcome-file>
    <welcome-file>default.html</welcome-file>
    <welcome-file>default.htm</welcome-file>
    <welcome-file>default.jsp</welcome-file>
  </welcome-file-list>
   <listener>
        <listener-class>org.jasig.cas.client.session.SingleSignOutHttpSessionListener</listener-class>
  </listener>

  <filter>
        <filter-name>CAS Single Sign Out Filter</filter-name>
        <filter-class>org.jasig.cas.client.session.SingleSignOutFilter</filter-class>
  </filter>
  <filter-mapping>
        <filter-name>CAS Single Sign Out Filter</filter-name>
        <url-pattern>*</url-pattern>
  </filter-mapping>

  <filter>
        <filter-name>CAS Validation Filter</filter-name>
        <filter-class>org.jasig.cas.client.validation.Cas20ProxyReceivingTicketValidationFilter</filter-class>
        <init-param>
            <param-name>casServerUrlPrefix</param-name>
            <param-value>http://localhost:9090/cas-server</param-value>
        </init-param>
        <init-param>
            <param-name>serverName</param-name>
            <param-value>http://localhost:8080</param-value>
        </init-param>
        <init-param>
            <param-name>useSession</param-name>
            <param-value>true</param-value>
        </init-param>
        <init-param>
            <param-name>redirectAfterValidation</param-name>
            <param-value>true</param-value>
        </init-param>
  </filter>
  <filter-mapping>
        <filter-name>CAS Validation Filter</filter-name>
        <url-pattern>*</url-pattern>
  </filter-mapping>

  <filter>
        <filter-name>CAS Filter</filter-name>
        <filter-class>org.jasig.cas.client.authentication.AuthenticationFilter</filter-class>
        <init-param>
            <param-name>casServerLoginUrl</param-name>
            <param-value>http://localhost:9090/cas-server/login</param-value>
        </init-param>
        <init-param>
            <param-name>serverName</param-name>
            <param-value>http://localhost:8080</param-value>
        </init-param>
  </filter>
  <filter-mapping>
        <filter-name>CAS Filter</filter-name>
        <url-pattern>*</url-pattern>
  </filter-mapping>

  <filter>
        <filter-name>CAS HttpServletRequest Wrapper Filter</filter-name>
        <filter-class>org.jasig.cas.client.util.HttpServletRequestWrapperFilter</filter-class>
  </filter>
  <filter-mapping>
        <filter-name>CAS HttpServletRequest Wrapper Filter</filter-name>
        <url-pattern>*</url-pattern>
  </filter-mapping>
</web-app>
看到了没有,有这么一堆的listener和filter,而且它们一个不能漏,并且它们的顺序也是绝对不能够错的,一定要按照下面这个从上至下的顺序:
org.jasig.cas.client.session.SingleSignOutHttpSessionListener
org.jasig.cas.client.session.SingleSignOutFilter
org.jasig.cas.client.validation.Cas20ProxyReceivingTicketValidationFilter
org.jasig.cas.client.authentication.AuthenticationFilter
org.jasig.cas.client.util.HttpServletRequestWrapperFilter
漏了一个,或者顺序错了,你将会发生下列情况:
- 可以正常登录,无法统一注销,即然是单点登录,那么我在任意一个站点上点“注销“是不是也因该是统一注销啊?
- 可以登录,可以统一注销,但是拿不到cas-server上登录的用户的user session,如果我们是两个系统,那么这两个系统是不是都有web sesssion?较常用的就是user session,那么如果你的顺序配错了,或者是你漏配了一个,你是得不到cas-server上传过来的用户的一些登录信息的,这个很糟糕,这将会为我们后面的编程开发带来烦恼
- 不能登录
<init-param>
        <param-name>casServerUrlPrefix</param-name>
        <param-value>http://localhost:9090/cas-server</param-value>
</init-param>
<init-param>
        <param-name>serverName</param-name>
        <param-value>http://localhost:8080</param-value>
</init-param>
记住,上面的那行代表我们的cas server的服务器所在的地址,当用户用上面的cas-server的登录界面登录成功后,cas server 会自动跳回用户在ie地址里输入的子系统地址的首页。
如:我们先输入http://localhost:8080/cas-sample-site1,此时系统会先跳到http://localhost:9090/cas-server/login的画面要求用户先去做一次登录。
那么cas server它是怎么知道子系统地址的首页位于哪个地址(哪台服务器上)的呢,那么你要”注册“这个地址给cas server。
因此,第二行就是我们的具体的子系统的首页所在的地址。
这样的地方在我们的web.xml文件中一共出现了两处:
- 一处位于org.jasig.cas.client.validation.Cas20ProxyReceivingTicketValidationFilter
- 一处位于org.jasig.cas.client.authentication.AuthenticationFilter
- 登录后无法正常跳回子系统的首页
- 无法正常退出
- 无法做系统间切换时的跳转
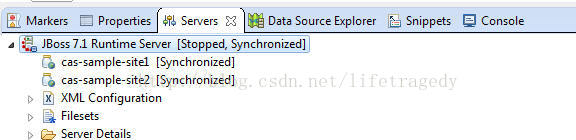
我们把两个工程通过ECLIPSE布署在JBOSS7上,然后运行起来吧。
别忘了启动我们的Tomcat里的cas server哦。
全部启动完毕后我们在IE浏览器里输入:http://localhost:8080/cas-sample-site1
此时浏览器显示如下画面
我们在cas server的登录画面输入我们数据库表sys_user中的相应的用户名与密码后,再来看此时的浏览器它会跑到哪儿去?
点击cas-sample-site2这个链接呢?
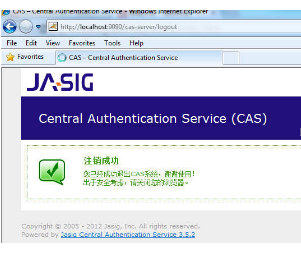
然后点击“退出”这个链接
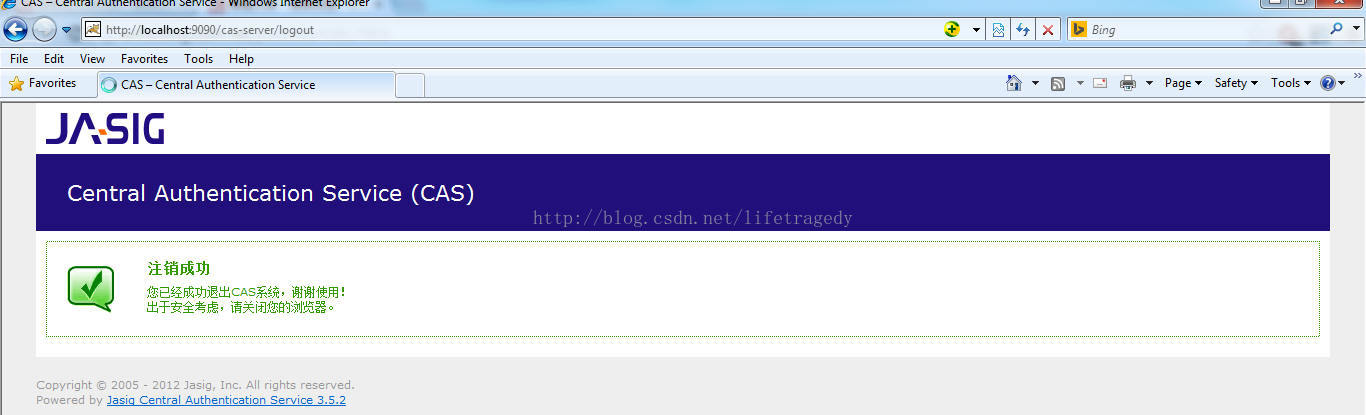
此时我们再在浏览器里输入:http://localhost:8080/cas-sample-site2--有时浏览器有缓存,它还是会显示cas-sample-site2的首页,这时你可以点一下F5或者是刷新按钮(这个可以通过代码来避免jsp或者是html页中使用缓存来做到)
look!
由于是统一注销,因此一旦注销,两个WEB都无法访问了,必须要求“统一登录一下”,于是我们再次输入用户名和密码

来源: https://blog.csdn.net/u012891504/article/details/52472818


