原创文章,转载请指明出处并保留原文url地址
现在网络完全越来越受到重视, 因此https也是大势所趋, 以往nginx都是工作在http方式下, 其实nginx在https下工作也挺好的。 这里将分步骤的逐步实现一套采用nginx, haproxy, keepalived实现的https系统, 并且系统没有单点故障, 基本适应中小系统的安全需要。
1. Nginx https安装 这个文章主要是安装支持https的nginx, 源代码装过程
2. https安装(2)nginx配置 (本文)继承上一个文章, 记录配置过程, 然后实现https服务
3. 两台nginx实现https负载均衡 介绍通过haproxy实现两个nginx的负载均衡, 解决nginx的单点故障
前一篇文章 Nginx https安装
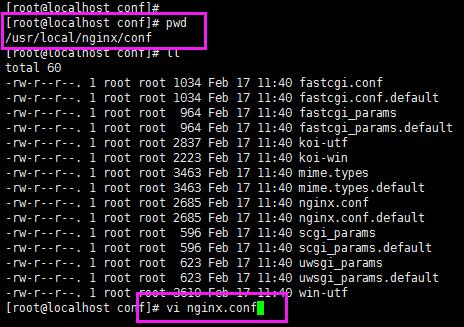
1. 配置nginx服务器
进入nginx的安装目录
[root@iig conf]# cat nginx.conf
worker_processes  1;
events {
    worker_connections  1024;
}


http {
    include       mime.types;
    default_type  application/octet-stream;
    sendfile        on;
    keepalive_timeout  65;

    server {
        listen       80;
        server_name  www.iigrowing.cn;
        location / {
            root   www.iigrowing.cn;
            index  index.html index.htm;
        }
    }
}
2. 生成证书
进入证书的目录cd /etc/pki/tls/certs/,创建证书然后设置密码

make rsyslog.key

[root@iig certs]# openssl rsa -in rsyslog.key -out rsyslog.key
Enter pass phrase for rsyslog.key:
writing RSA key
[root@iig certs]#
3. 创建证书rsyslog.csr
在创建的时候需要注意要的是要写对计算机名字,可以用hostname来查看。

[root@iig certs]# hostname
iig.local.ftp
[root@iig certs]# make rsyslog.csr
umask 77 ; \
/usr/bin/openssl req -utf8 -new -key rsyslog.key -out rsyslog.csr
You are about to be asked to enter information that will be incorporated
into your certificate request.
What you are about to enter is what is called a Distinguished Name or a DN.
There are quite a few fields but you can leave some blank
For some fields there will be a default value,
If you enter '.', the field will be left blank.
-----
Country Name (2 letter code) [GB]:GB
State or Province Name (full name) [Berkshire]:beijing
Locality Name (eg, city) [Newbury]:beijing
Organization Name (eg, company) [My Company Ltd]:www.iigrowing.cn
Organizational Unit Name (eg, section) []:iigrowing
Common Name (eg, your name or your server's hostname) []:iig.local.ftp
Email Address []:
Please enter the following 'extra' attributes
to be sent with your certificate request
A challenge password []:
An optional company name []:
4. 生成证书机构用于颁发公钥
因为我们是在本地生成的没有在互联网CA证书机构颁发证书,因此在访问的时候会弹出浏览器警告,我们添加到证书信任机构就可以了。

[root@iig certs]#
[root@iig certs]# openssl x509 -in rsyslog.csr -req -signkey rsyslog.key -days 365 -out rsyslog.crt
Signature ok
subject=/C=GB/ST=beijing/L=beijing/O=www.iigrowing.cn/OU=iigrowing/CN=iig.local.ftp
Getting Private key
[root@iig certs]#
5. 修改nginx配置文件
修改配置文件,需要注意的是我们把默认的ssl模块复制到我们创建的虚拟目录里面即可,默认的不要打开,然后修改路径即可。如图是完成的配置。记得重启服务。
worker_processes 1;
events {
worker_connections 1024;
}
http {
include mime.types;
default_type application/octet-stream;
sendfile on;
keepalive_timeout 65;
server {
listen 80;
server_name www.iigrowing.cn;
location / {
root www.iigrowing.cn;
index index.html index.htm;
}
}
server {
listen 443;
server_name www.iigrowing.cn;
ssl on;
ssl_certificate /etc/pki/tls/certs/rsyslog.crt;
ssl_certificate_key /etc/pki/tls/certs/rsyslog.key;
ssl_session_timeout 5m;
ssl_protocols SSLv2 SSLv3 TLSv1;
ssl_ciphers ALL:!ADH:!EXPORT56:RC4+RSA:+HIGH:+MEDIUM:+LOW:+SSLv2:+EXP;
ssl_prefer_server_ciphers on;
location / {
root www.iigrowing.cn;
index index.html index.htm;
}
}
}
6. 测试https协议
在如下目录, 创建a.txt文件, 内容如下图

打开浏览器, 输入如下地址: https://www.iigrowing.cn/a.txt

显示结果


