在上一篇《OAuth 2.0 授权码请求》中我们已经可以获取到access_token了,本节将使用客户端来访问远程资源
配置资源服务器
授权服务器负责生成并发放访问令牌(access_token),客户端在访问受保护的资源时会带上访问令牌,资源服务器需要解析并验证客户端带的这个访问令牌。
如果你的资源服务器同时也是一个授权服务器(资源服务器和授权服务器在一起),那么资源服务器就不需要考虑令牌解析的事情了,否则这一步是不可或缺的。
To use the access token you need a Resource Server (which can be the same as the Authorization Server). Creating a Resource Server is easy, just add @EnableResourceServer and provide some configuration to allow the server to decode access tokens. If your application is also an Authorization Server it already knows how to decode tokens, so there is nothing else to do. If your app is a standalone service then you need to give it some more configuration.
同时,把它们放在一起的话还有一个问题需要注意,我们知道过滤器是顺序执行的,因此需要确保那些通过访问令牌来访问的资源路径不能被主过滤拦下了,需要单独摘出来。
Note: if your Authorization Server is also a Resource Server then there is another security filter chain with lower priority controlling the API resources. Fo those requests to be protected by access tokens you need their paths not to be matched by the ones in the main user-facing filter chain, so be sure to include a request matcher that picks out only non-API resources in the WebSecurityConfigurer above.
关于Spring Security中过滤器的顺序可以参见
https://docs.spring.io/spring-security/site/docs/5.0.6.RELEASE/reference/htmlsingle/#filter-ordering
这里偷个懒将它们放在一起:
package com.cjs.example.config;

import org.springframework.context.annotation.Configuration;
import org.springframework.security.config.annotation.web.builders.HttpSecurity;
import org.springframework.security.oauth2.config.annotation.web.configuration.EnableResourceServer;
import org.springframework.security.oauth2.config.annotation.web.configuration.ResourceServerConfigurerAdapter;
import org.springframework.security.oauth2.config.annotation.web.configurers.ResourceServerSecurityConfigurer;
import org.springframework.security.oauth2.provider.expression.OAuth2WebSecurityExpressionHandler;

@Configuration
@EnableResourceServer
public class ResourceServerConfig extends ResourceServerConfigurerAdapter {

    @Override
    public void configure(ResourceServerSecurityConfigurer resources) throws Exception {
        super.configure(resources);
    }

    /**
     * 用于配置对受保护的资源的访问规则
     * 默认情况下所有不在/oauth/**下的资源都是受保护的资源
     * {@link OAuth2WebSecurityExpressionHandler}
     */
    @Override
    public void configure(HttpSecurity http) throws Exception {
        http.requestMatchers().antMatchers("/haha/**")
                .and()
                .authorizeRequests()
                .anyRequest().authenticated();
    }
}
这里配置很简洁,很多都用了默认的设置(比如:resourceId,accessDeniedHandler,sessionManagement等等,具体可参见源码)
接下来,看看本例中我们被保护的资源,简单的几个资源(都以/haha开头),只为测试:
package com.cjs.example.controller;

import com.cjs.example.domain.UserInfo;
import org.springframework.security.access.prepost.PreAuthorize;
import org.springframework.web.bind.annotation.GetMapping;
import org.springframework.web.bind.annotation.RequestMapping;
import org.springframework.web.bind.annotation.RestController;

import java.security.Principal;

@RestController
@RequestMapping("/haha")
public class MainController {

    @GetMapping("/sayHello")
    public String sayHello(String name) {
        return "Hello, " + name;
    }

    @PreAuthorize("hasAnyRole('ADMIN')")
    @RequestMapping("/sayHi")
    public String sayHi() {
        return "hahaha";
    }

    @RequestMapping("/userInfo")
    public UserInfo userInfo(Principal principal) {
        UserInfo userInfo = new UserInfo();
        userInfo.setName(principal.getName());
        return userInfo;
    }
}
授权服务器配置
package com.cjs.example.config;

import org.springframework.beans.factory.annotation.Autowired;
import org.springframework.context.annotation.Bean;
import org.springframework.context.annotation.Configuration;
import org.springframework.data.redis.connection.RedisConnectionFactory;
import org.springframework.security.oauth2.config.annotation.configurers.ClientDetailsServiceConfigurer;
import org.springframework.security.oauth2.config.annotation.web.configuration.AuthorizationServerConfigurerAdapter;
import org.springframework.security.oauth2.config.annotation.web.configuration.EnableAuthorizationServer;
import org.springframework.security.oauth2.config.annotation.web.configurers.AuthorizationServerEndpointsConfigurer;
import org.springframework.security.oauth2.config.annotation.web.configurers.AuthorizationServerSecurityConfigurer;
import org.springframework.security.oauth2.provider.token.TokenStore;
import org.springframework.security.oauth2.provider.token.store.redis.RedisTokenStore;


@Configuration
@EnableAuthorizationServer
public class AuthorizationServerConfig extends AuthorizationServerConfigurerAdapter {

    @Autowired
    private RedisConnectionFactory connectionFactory;

    @Override
    public void configure(AuthorizationServerSecurityConfigurer security) throws Exception {
        super.configure(security);
    }

    @Override
    public void configure(ClientDetailsServiceConfigurer clients) throws Exception {
        clients.inMemory()
                .withClient("my-client-1")
                .secret("$2a$10$0jyHr4rGRdQw.X9mrLkVROdQI8.qnWJ1Sl8ly.yzK0bp06aaAkL9W")
                .authorizedGrantTypes("authorization_code", "refresh_token")
                .scopes("read", "write", "execute")
                .redirectUris("http://localhost:8081/login/oauth2/code/callback");
//                .redirectUris("http://www.baidu.com");
    }

    @Override
    public void configure(AuthorizationServerEndpointsConfigurer endpoints) throws Exception {
        endpoints.tokenStore(tokenStore());
    }

    @Bean
    public TokenStore tokenStore() {
        return new RedisTokenStore(connectionFactory);
    }


    public static void main(String[] args) {
        System.out.println(new org.apache.tomcat.util.codec.binary.Base64().encodeAsString("my-client-1:12345678".getBytes()));
        System.out.println(java.util.Base64.getEncoder().encodeToString("my-client-1:12345678".getBytes()));
    }
}
和之前相比,我们增加了TokenStore,将Token存储到Redis中。否则默认放在内存中的话每次重启的话token都丢了。下面是一个例子:

application.yml如下:
server:
  port: 8080

spring:
  redis:
    host: 127.0.0.1
    port: 6379

logging:
  level:
    root: debug
    org.springframework.web: debug
    org.springframework.security: debug
WebSecurity配置
我们有了资源,有了授权,我们还缺少用户。WebSecurity主要是配置咱们这个项目的一些安全配置,比如用户、认证、授权等等。
package com.cjs.example.config;

import org.springframework.context.annotation.Bean;
import org.springframework.context.annotation.Configuration;
import org.springframework.security.config.annotation.authentication.builders.AuthenticationManagerBuilder;
import org.springframework.security.config.annotation.method.configuration.EnableGlobalMethodSecurity;
import org.springframework.security.config.annotation.web.builders.HttpSecurity;
import org.springframework.security.config.annotation.web.builders.WebSecurity;
import org.springframework.security.config.annotation.web.configuration.EnableWebSecurity;
import org.springframework.security.config.annotation.web.configuration.WebSecurityConfigurerAdapter;
import org.springframework.security.crypto.bcrypt.BCryptPasswordEncoder;
import org.springframework.security.crypto.password.PasswordEncoder;

@Configuration
@EnableWebSecurity
@EnableGlobalMethodSecurity(prePostEnabled = true, proxyTargetClass = true)
public class WebSecurityConfig extends WebSecurityConfigurerAdapter {

    @Override
    protected void configure(AuthenticationManagerBuilder auth) throws Exception {
        auth.inMemoryAuthentication()
                .withUser("zhangsan")
                .password("$2a$10$qsJ/Oy1RmUxFA.YtDT8RJ.Y2kU3U4z0jvd35YmiMOAPpD.nZUIRMC")
                .roles("USER")
                .and()
                .withUser("lisi")
                .password("$2a$10$qsJ/Oy1RmUxFA.YtDT8RJ.Y2kU3U4z0jvd35YmiMOAPpD.nZUIRMC")
                .roles("USER", "ADMIN");
    }

    @Override
    public void configure(WebSecurity web) throws Exception {
        web.ignoring().antMatchers("/css/**", "/js/**", "/plugins/**", "/favicon.ico");
    }

    @Override
    protected void configure(HttpSecurity http) throws Exception {
        super.configure(http);
    }

    @Bean
    public PasswordEncoder passwordEncoder() {
        return new BCryptPasswordEncoder();
    }


    public static void main(String[] args) {
        BCryptPasswordEncoder bCryptPasswordEncoder = new BCryptPasswordEncoder();
        System.out.println(bCryptPasswordEncoder.encode("123456"));
        System.out.println(bCryptPasswordEncoder.encode("12345678"));
    }
}
这里多说两句,关于Endpoint和HttpSecurity
Endpoint
有很多端点我们是可以重写的,比如:/login,/oauth/token等等

HttpSecurity
很多初学者可能会不知道怎么配置HttpSecurity,这个时候其实最好的方法就是看代码或者API文档
下面一起看一下常见的几个配置
我们先来看一下,当我们继承WebSecurityConfigurerAdapter之后它的默认的HttpSecurity是怎么配置的:
// @formatter:off
    protected void configure(HttpSecurity http) throws Exception {
        logger.debug("Using default configure(HttpSecurity). If subclassed this will potentially override subclass configure(HttpSecurity).");

        http
            .authorizeRequests()
                .anyRequest().authenticated()
                .and()
            .formLogin().and()
            .httpBasic();
    }
    // @formatter:on
可以看到,所有的请求都需要授权,并且指定登录的uri是/login,同时支持Basic认证。
requestMatchers()
这个方法是用于限定只有特定的HttpServletRequest实例才会导致该HttpSecurity被调用,当然是通过请求uri进行限定的了。它后面可以接多个匹配规则。例如:
@Configuration
@EnableWebSecurity
public class RequestMatchersSecurityConfig extends WebSecurityConfigurerAdapter {

        @Override
        protected void configure(HttpSecurity http) throws Exception {
                http
                        .requestMatchers()
                                .antMatchers("/api/**")
                                .antMatchers("/oauth/**")
                                .and()
                        .authorizeRequests()
                                .antMatchers("/**").hasRole("USER")
                                .and()
                        .httpBasic();
        }

    /*  与上面那段等价
        @Override
        protected void configure(HttpSecurity http) throws Exception {
                http
                        .requestMatchers()
                                .antMatchers("/api/**")
                                .and()
                         .requestMatchers()
                                .antMatchers("/oauth/**")
                                .and()
                        .authorizeRequests()
                                .antMatchers("/**").hasRole("USER")
                                .and()
                        .httpBasic();
        }
    */

        @Override
        protected void configure(AuthenticationManagerBuilder auth) throws Exception {
                auth
                        .inMemoryAuthentication()
                                .withUser("user").password("password").roles("USER");
        }
}
formLogin()
该方法是用于配置登录相关的设置的。例如:
@Configuration
@EnableWebSecurity
public class FormLoginSecurityConfig extends WebSecurityConfigurerAdapter {
@Override
protected void configure(HttpSecurity http) throws Exception {
http.authorizeRequests().antMatchers("/**").hasRole("USER").and().formLogin()
.usernameParameter("username") // default is username
.passwordParameter("password") // default is password
.loginPage("/authentication/login") // default is /login with an HTTP get
.failureUrl("/authentication/login?failed") // default is /login?error
.loginProcessingUrl("/authentication/login/process"); // default is /login
}
@Override
protected void configure(AuthenticationManagerBuilder auth) throws Exception {
auth.inMemoryAuthentication().withUser("user").password("password").roles("USER");
}
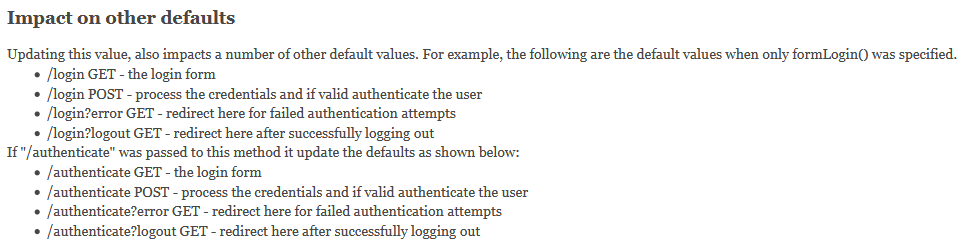
}当我们没有配置登录的时候,会用默认的登录,有默认的登录页面,还有好多默认的登录配置。具体可参见 FormLoginConfigurer.loginPage(String)方法
authorizeRequests()
该方法允许基于HttpServletRequest进行访问限制,比如角色、权限。例如:
 @Configuration
 @EnableWebSecurity
 public class AuthorizeUrlsSecurityConfig extends WebSecurityConfigurerAdapter {

        @Override
        protected void configure(HttpSecurity http) throws Exception {
                http.authorizeRequests().antMatchers("/admin/**").hasRole("ADMIN")
                                .antMatchers("/**").hasRole("USER").and().formLogin();
        }

        @Override
        protected void configure(AuthenticationManagerBuilder auth) throws Exception {
                auth.inMemoryAuthentication().withUser("user").password("password").roles("USER")
                                .and().withUser("admin").password("password").roles("ADMIN", "USER");
        }
 }
anyRequest()表示匹配任意请求
authenticated()表示只有认证通过的用户才可以访问
更多可以参见API文档:https://docs.spring.io/spring-security/site/docs/5.0.6.RELEASE/api/
用Postman访问资源
获取授权码
在浏览器中输入http://localhost:8080/oauth/authorize?response_type=code&client_id=my-client-1&redirect_uri=http://www.baidu.com&scope=read
然后跳到登录页面,输入用户名和密码登录,然后从重定向url中拿到code
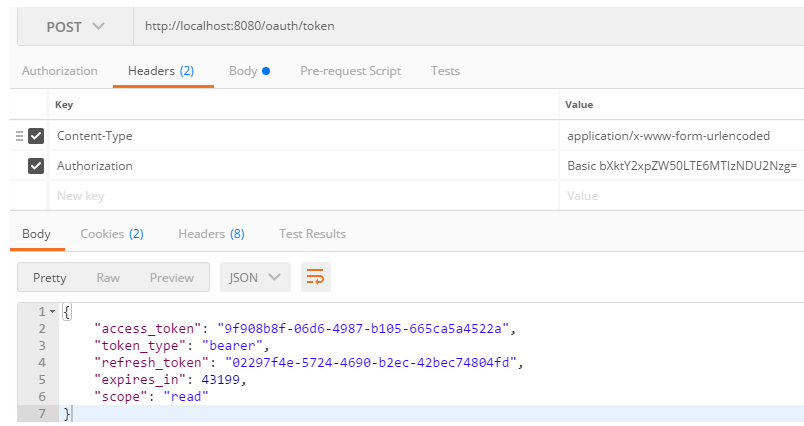
换取访问令牌
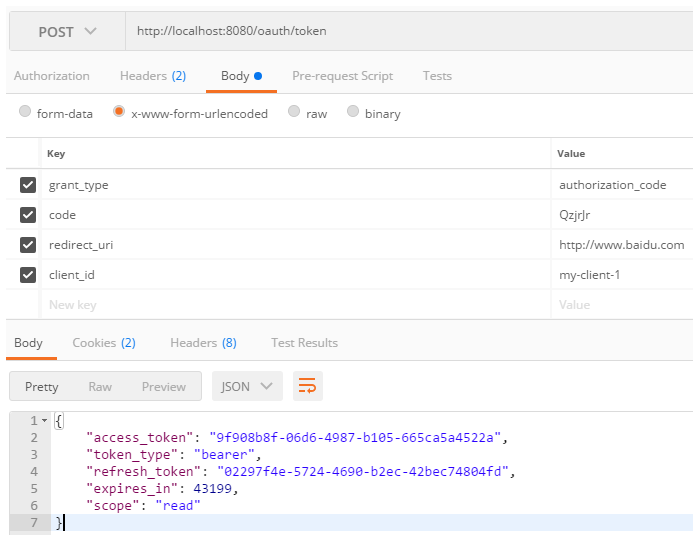
访问资源
http://localhost:8080/haha/sayHi?access_token=9f908b8f-06d6-4987-b105-665ca5a4522a

{
    "error": "access_denied",
    "error_description": "不允许访问"
}
这里不允许访问是因为我用zhangsan登录的,他不在ADMIN角色中

http://localhost:8080/haha/userInfo?access_token=9f908b8f-06d6-4987-b105-665ca5a4522a

{
    "name": "zhangsan"
}

http://localhost:8080/haha/sayHello?name=jack&access_token=9f908b8f-06d6-4987-b105-665ca5a4522a

Hello, jack
通过客户端程序访问资源
访问GitHub
参照SpringBoot官网的示例
https://github.com/spring-projects/spring-boot/tree/master/spring-boot-samples/spring-boot-sample-oauth2-client
https://github.com/spring-projects
https://github.com/spring-projects/spring-boot
可以将代码拷下来 https://github.com/spring-projects/spring-boot.git
第一步 将我们的客户端注册到GitHub上去
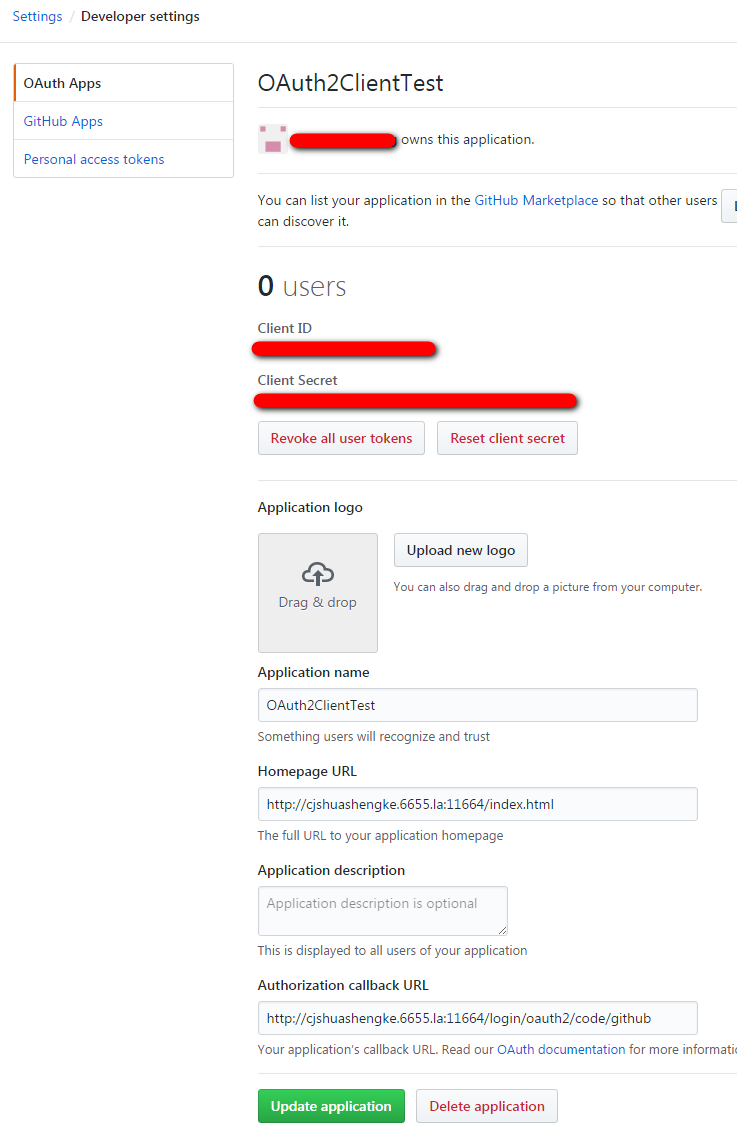
GitHub的OAuth文档在这里 https://developer.github.com/apps/building-oauth-apps/authorizing-oauth-apps/
第二步 浏览器输入http://localhost:8080/后出现如下界面
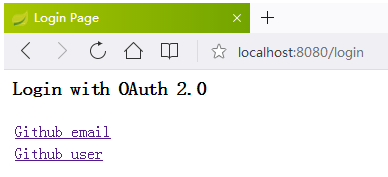
第三步 点击任意一个连接,跳GitHub登录
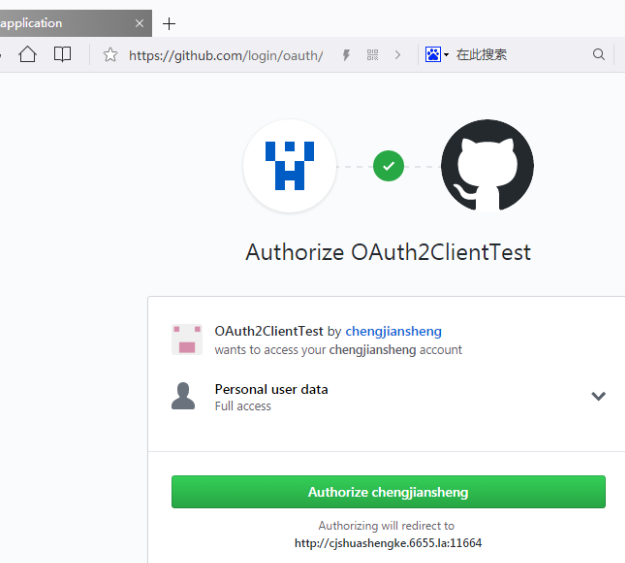
授权以后就可以重定向到我们的localhost:8080/了

主要配置如下:
APP-CLIENT-ID: 7e304109d91ed8e9bf72
APP-CLIENT-SECRET: 003daa47fa0f350d181c8741d8bac6833aef568a

spring:
  security:
    oauth2:
      client:
        registration:
          github-client-1:
            client-id: ${APP-CLIENT-ID}
            client-secret: ${APP-CLIENT-SECRET}
            client-name: Github user
            provider: github
            scope: user
            redirect-uri-template: http://cjshuashengke.6655.la:11664/login/oauth2/code/github
          github-client-2:
            client-id: ${APP-CLIENT-ID}
            client-secret: ${APP-CLIENT-SECRET}
            client-name: Github email
            provider: github
            scope: user:email
            redirect-uri-template: http://cjshuashengke.6655.la:11664/login/oauth2/code/github
pom.xml如下
<?xml version="1.0" encoding="UTF-8"?>
<project xmlns="http://maven.apache.org/POM/4.0.0" xmlns:xsi="http://www.w3.org/2001/XMLSchema-instance"
    xsi:schemaLocation="http://maven.apache.org/POM/4.0.0 http://maven.apache.org/xsd/maven-4.0.0.xsd">
    <modelVersion>4.0.0</modelVersion>

    <groupId>sample.oauth2.client</groupId>
    <artifactId>spring-boot-sample-oauth2-client</artifactId>
    <version>0.0.1-SNAPSHOT</version>
    <packaging>jar</packaging>

    <parent>
        <groupId>org.springframework.boot</groupId>
        <artifactId>spring-boot-starter-parent</artifactId>
        <version>2.0.3.RELEASE</version>
        <relativePath/> <!-- lookup parent from repository -->
    </parent>

    <properties>
        <project.build.sourceEncoding>UTF-8</project.build.sourceEncoding>
        <project.reporting.outputEncoding>UTF-8</project.reporting.outputEncoding>
        <java.version>1.8</java.version>
    </properties>

    <dependencies>
        <!-- Compile -->
        <dependency>
            <groupId>org.springframework.boot</groupId>
            <artifactId>spring-boot-starter-security</artifactId>
        </dependency>
        <dependency>
            <groupId>org.springframework.boot</groupId>
            <artifactId>spring-boot-starter-web</artifactId>
        </dependency>
        <dependency>
            <groupId>org.springframework.security</groupId>
            <artifactId>spring-security-config</artifactId>
        </dependency>
        <dependency>
            <groupId>org.springframework.security</groupId>
            <artifactId>spring-security-oauth2-client</artifactId>
        </dependency>
        <dependency>
            <groupId>org.springframework.security</groupId>
            <artifactId>spring-security-oauth2-jose</artifactId>
        </dependency>
        <!-- Test -->
        <dependency>
            <groupId>org.apache.httpcomponents</groupId>
            <artifactId>httpclient</artifactId>
            <scope>test</scope>
        </dependency>
        <dependency>
            <groupId>org.springframework.boot</groupId>
            <artifactId>spring-boot-starter-test</artifactId>
            <scope>test</scope>
        </dependency>
    </dependencies>
    <build>
        <plugins>
            <plugin>
                <groupId>org.springframework.boot</groupId>
                <artifactId>spring-boot-maven-plugin</artifactId>
            </plugin>
        </plugins>
    </build>
</project>
启动类
package sample.oauth2.client;

import org.springframework.boot.SpringApplication;
import org.springframework.boot.autoconfigure.SpringBootApplication;

@SpringBootApplication
public class SampleOAuth2ClientApplication {

    public static void main(String[] args) {
        SpringApplication.run(SampleOAuth2ClientApplication.class);
    }

}
ExampleController
package sample.oauth2.client;

import java.security.Principal;

import org.springframework.web.bind.annotation.RequestMapping;
import org.springframework.web.bind.annotation.RestController;

@RestController
public class ExampleController {

    @RequestMapping("/")
    public String email(Principal principal) {
        return "Hello " + principal.getName();
    }

}
访问自定义的Provider
在这里我遇到一些问题,将provider换成自己的localhost:8080就总是报错,不知道什么原因。
想想还是写出来吧,希望有大神看到帮我指点迷津。。。
首先需要明确一点:Spring Security OAuth2提供了一套客户端实现,Spring Boot也有它自己的方式。
这里我是按照Spring Boot的那一套来的
Spring Boot最大的优点莫过于自动配置了
只要在你的classpath下有spring-security-oauth2-client,那么将会自动配置OAuth2 Client。
配置的属性用的是OAuth2ClientProperties
具体参见 https://docs.spring.io/spring-boot/docs/2.0.3.RELEASE/reference/htmlsingle/#boot-features-security-oauth2
例如:
默认情况下,Spring Security的OAuth2LoginAuthenticationFilter只处理URL匹配/login/oauth2/code/*的请求。
如果你想自定义redirect-uri-template可以在WebSecurityConfigurerAdapter中配置。例如:
public class OAuth2LoginSecurityConfig extends WebSecurityConfigurerAdapter {
@Override
protected void configure(HttpSecurity http) throws Exception {
http
.authorizeRequests()
.anyRequest().authenticated()
.and()
.oauth2Login()
.redirectionEndpoint()
.baseUri("/custom-callback");
}
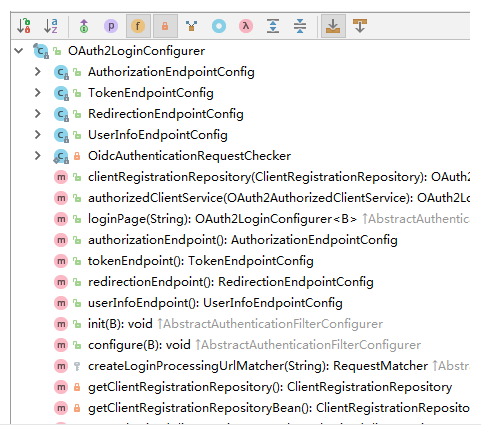
}其实,不仅仅可以自定义重定向端点,其它的比如授权端点也是可以自定义的,可参见源码
下面重点说下我的配置
pom.xml
<?xml version="1.0" encoding="UTF-8"?>
<project xmlns="http://maven.apache.org/POM/4.0.0" xmlns:xsi="http://www.w3.org/2001/XMLSchema-instance"
xsi:schemaLocation="http://maven.apache.org/POM/4.0.0 http://maven.apache.org/xsd/maven-4.0.0.xsd">
<modelVersion>4.0.0</modelVersion>
<groupId>com.cjs.example</groupId>
<artifactId>cjs-oauth2-code-client</artifactId>
<version>0.0.1-SNAPSHOT</version>
<packaging>jar</packaging>
<name>cjs-oauth2-code-client</name>
<description></description>
<parent>
<groupId>org.springframework.boot</groupId>
<artifactId>spring-boot-starter-parent</artifactId>
<version>2.0.2.RELEASE</version>
<relativePath/> <!-- lookup parent from repository -->
</parent>
<properties>
<project.build.sourceEncoding>UTF-8</project.build.sourceEncoding>
<project.reporting.outputEncoding>UTF-8</project.reporting.outputEncoding>
<java.version>1.8</java.version>
</properties>
<dependencies>
<dependency>
<groupId>org.springframework.boot</groupId>
<artifactId>spring-boot-starter-security</artifactId>
</dependency>
<dependency>
<groupId>org.springframework.boot</groupId>
<artifactId>spring-boot-starter-web</artifactId>
</dependency>
<dependency>
<groupId>org.springframework.security</groupId>
<artifactId>spring-security-config</artifactId>
</dependency>
<dependency>
<groupId>org.springframework.security</groupId>
<artifactId>spring-security-oauth2-client</artifactId>
</dependency>
<dependency>
<groupId>org.springframework.security</groupId>
<artifactId>spring-security-oauth2-jose</artifactId>
</dependency>
<dependency>
<groupId>org.springframework.security.oauth</groupId>
<artifactId>spring-security-oauth2</artifactId>
<version>2.3.3.RELEASE</version>
</dependency>
<dependency>
<groupId>org.springframework.boot</groupId>
<artifactId>spring-boot-starter-test</artifactId>
<scope>test</scope>
</dependency>
</dependencies>
<build>
<plugins>
<plugin>
<groupId>org.springframework.boot</groupId>
<artifactId>spring-boot-maven-plugin</artifactId>
</plugin>
</plugins>
</build>
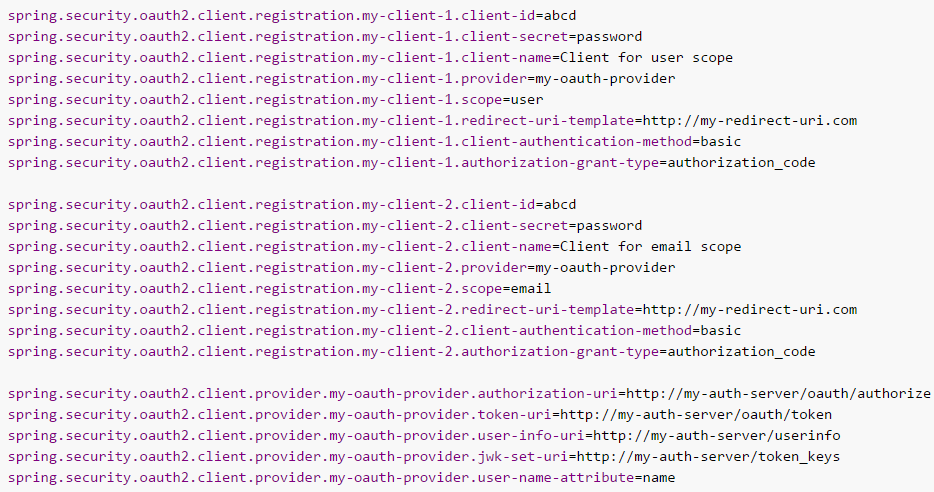
</project>application.yml
server:
  port: 8081

spring:
  security:
    oauth2:
      client:
        registration:
          my-client-1:
            client-id: my-client-1
            client-secret: 12345678
            client-name: ABC
            provider: my-oauth-provider
            scope: read
            redirect-uri-template: http://localhost:8081/login/oauth2/code/callback
            client-authentication-method: basic
            authorization-grant-type: authorization_code
        provider:
          my-oauth-provider:
            authorization-uri: http://localhost:8080/oauth/authorize
            token-uri: http://localhost:8080/oauth/token
logging:
  level:
    root: debug
分别启动两个项目
浏览器输入http://localhost:8080/test
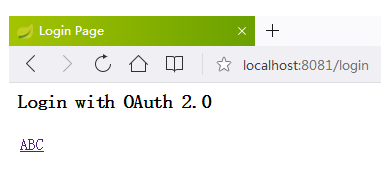
点击链接ABC

输入zhangsan/123456,结果报错了
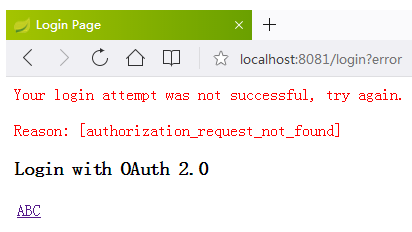
查看控制台错误信息
org.springframework.security.oauth2.core.OAuth2AuthenticationException: [authorization_request_not_found]
	at org.springframework.security.oauth2.client.web.OAuth2LoginAuthenticationFilter.attemptAuthentication(OAuth2LoginAuthenticationFilter.java:146)
	at org.springframework.security.web.authentication.AbstractAuthenticationProcessingFilter.doFilter(AbstractAuthenticationProcessingFilter.java:212)
	at org.springframework.security.web.FilterChainProxy$VirtualFilterChain.doFilter(FilterChainProxy.java:334) [spring-security-web-5.0.5.RELEASE.jar:5.0.5.RELEASE]
	at org.springframework.security.oauth2.client.web.OAuth2AuthorizationRequestRedirectFilter.doFilterInternal(OAuth2AuthorizationRequestRedirectFilter.java:128)
	at org.springframework.web.filter.OncePerRequestFilter.doFilter(OncePerRequestFilter.java:107) [spring-web-5.0.6.RELEASE.jar:5.0.6.RELEASE]
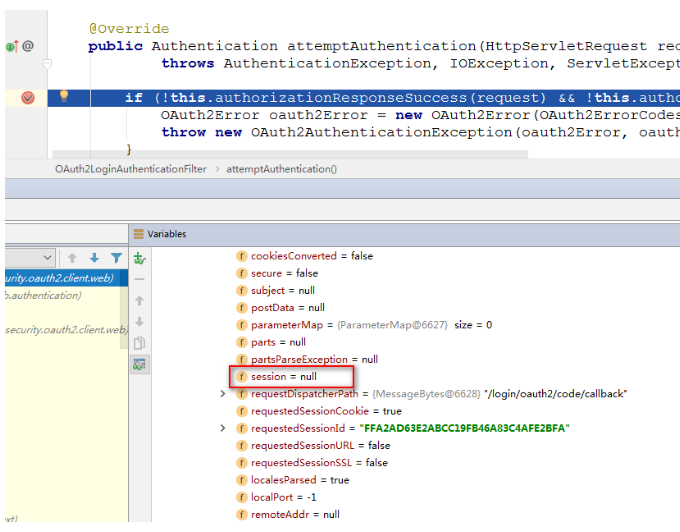
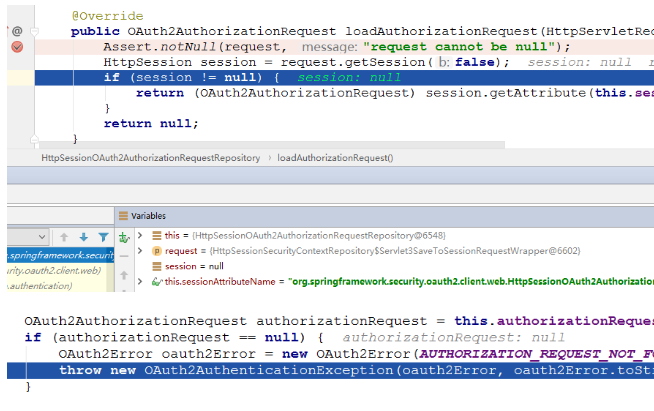
打端点,发现重定向过来的HttpServletRequest中session=null
正常情况下session不应该是null,而且属性中还应该有一个key为org.springframework.security.oauth2.client.web.HttpSessionOAuth2AuthorizationRequestRepository.AUTHORIZATION_REQUEST的属性的

后来看根据Spring Security那一套说用@EnableOAuth2Client
利用OAuth2RestTemplate来访问资源,具体参见《Spring Security OAuth 2.0》
但是我发现加了这些问题依旧,根本问题是服务端带着code重定向到客户端的时候就失败了
在客户端收到的重定向请求中session为null
不知道大家有没有遇到这种问题,求路过的大神们支招。。。
下面贴出客户端完整代码
package com.cjs.example.controller;

import org.springframework.beans.factory.annotation.Autowired;
import org.springframework.security.oauth2.client.OAuth2RestTemplate;
import org.springframework.stereotype.Controller;
import org.springframework.web.bind.annotation.GetMapping;

import java.security.Principal;
@Controller
public class MainController {

    @Autowired
    private OAuth2RestTemplate oAuth2RestTemplate;

    @GetMapping("/test")
    public String test(Principal principal) {
        return "Hello, " + principal.getName();
    }

    @GetMapping("/hello")
    public String hello() {
        return oAuth2RestTemplate.getForObject("http://localhost:8080/sayHi", String.class);
    }
}
package com.cjs.example;
import org.springframework.beans.factory.annotation.Autowired;
import org.springframework.boot.SpringApplication;
import org.springframework.boot.autoconfigure.SpringBootApplication;
import org.springframework.security.oauth2.client.OAuth2ClientContext;
import org.springframework.security.oauth2.client.OAuth2RestTemplate;
import org.springframework.security.oauth2.client.token.grant.code.AuthorizationCodeResourceDetails;
import org.springframework.context.annotation.Bean;
import org.springframework.security.oauth2.config.annotation.web.configuration.EnableOAuth2Client;
@EnableOAuth2Client
@SpringBootApplication
public class CjsOauth2CodeClientApplication {
public static void main(String[] args) {
SpringApplication.run(CjsOauth2CodeClientApplication.class, args);
}
@Autowired
private OAuth2ClientContext oauth2ClientContext;
@Bean
public OAuth2RestTemplate restTemplate() {
return new OAuth2RestTemplate(new AuthorizationCodeResourceDetails(), oauth2ClientContext);
}
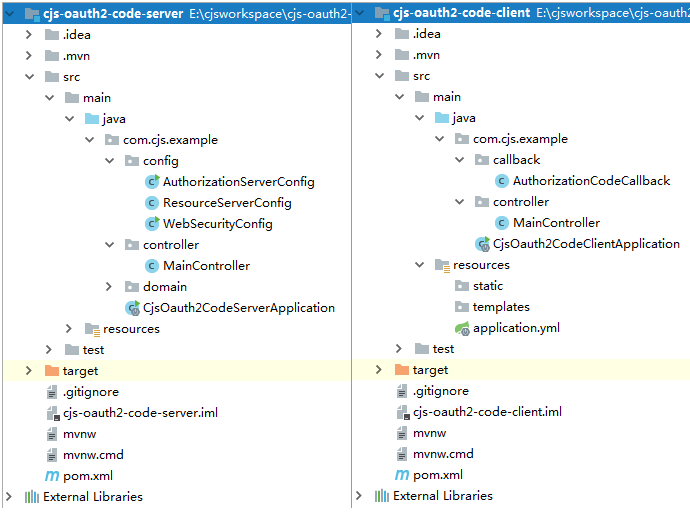
}工程截图
代码上传至 https://github.com/chengjiansheng/cjs-oauth2-example.git
参考
https://docs.spring.io/spring-security-oauth2-boot/docs/2.0.1.RELEASE/reference/pdf/spring-security-oauth2-boot-reference.pdf
https://docs.spring.io/spring-security/site/docs/5.0.6.RELEASE/reference/htmlsingle/#oauth2login-advanced-login-page
https://docs.spring.io/spring-security/site/docs/5.0.6.RELEASE/api/
https://github.com/spring-projects/spring-boot/tree/master/spring-boot-samples
https://segmentfault.com/a/1190000012309216
https://www.jianshu.com/p/bf5dd33aea6d?utm_source=oschina-app
https://www.aliyun.com/jiaocheng/800606.html
https://blog.csdn.net/peter1220/article/details/52413250
https://blog.csdn.net/weixin_42033269/article/details/80086422
来源:https://www.cnblogs.com/cjsblog/p/9241217.html

